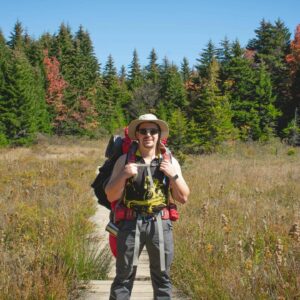
Camping can be a fun and relaxing way to connect with nature. Still, it’s important to remember that the wilderness can be unpredictable and dangerous. That’s why it’s essential to have a basic understanding of wilderness survival skills that could mean the difference between life and death in an emergency situation.
This article will explore 12 essential wilderness survival skills every camper should know. These skills will help you stay safe and comfortable in the wilderness, from finding water sources to building a shelter. Whether you’re an experienced hiker or a first-time camper, this guide will provide you with the knowledge and skills to navigate the outdoors confidently. So, let’s get started!
- 1. Navigation and Map Reading – Wilderness Survival 101
- 2. Building a Fire – Wilderness Survival 101
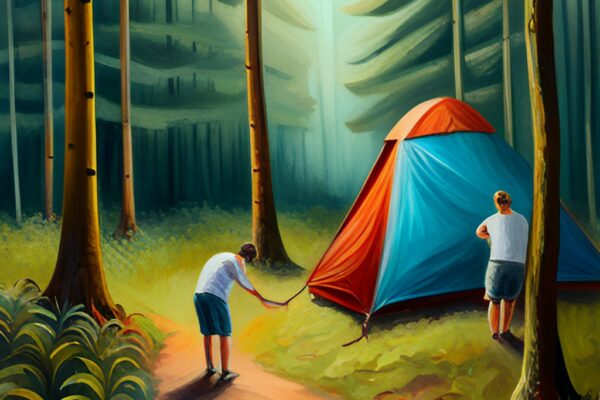
- 3. Shelter Building – Wilderness Survival 101
- 4. Finding and Purifying Water – Wilderness Survival 101
- 5. Identifying Edible Plants and Berries – Wilderness Survival 101
- 6. Fishing and Hunting for Food – Wilderness Survival 101
- 7. Basic First Aid – Wilderness Survival 101
- 8. Understanding Weather Patterns and Forecasts – Wilderness Survival 101
- 9. Knot Tying – Wilderness Survival 101
- 10. Basic Tool Use (Knife, Axe, Saw, etc.) – Wilderness Survival 101
- 11. Crossing Bodies of Water Safely – Wilderness Survival 101
- 12. Understanding and Recognizing Hypothermia and Heat Exhaustion – Wilderness Survival 101
- Conclusion – Wilderness Survival 101
- Frequently Asked Questions – Wilderness Survival 101
- 1. Why is Basic First Aid an Integral Wilderness Survival Skill? – FAQs
- 2. What are Some Ways to Learn How to Fish? – FAQs
- 3. What Materials Do You Need for a Campfire? – FAQs
- 4. Why is it Important to note landmarks when you are in the Wilderness? – FAQs
- 5. What are Some Weather Patterns that Signify Something is Going Wrong? – FAQs
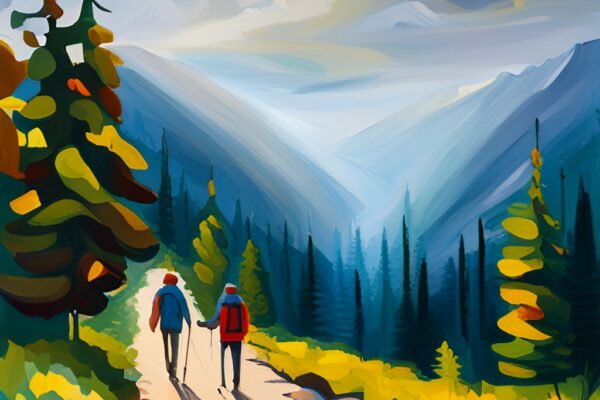
1. Navigation and Map Reading – Wilderness Survival 101
Navigation and map reading are essential wilderness survival skills because they help campers to avoid getting lost in the wilderness. Knowing how to read a map and use a compass can help any camper to determine their location and the direction they need to travel to reach a particular destination.
Additionally, understanding how to read terrain features and landmarks can help a camper navigate the wilderness even if they don’t have a map.
If a camper gets lost, having navigation and map-reading skills can increase the chances of being rescued or finding their way back to civilization. In short, navigation and map reading are essential skills for anyone planning to spend time in the wilderness, as they can mean the difference between life and death in an emergency.
How to Use a Compass to Navigate – Navigation and Map Reading
Using a compass to navigate the wilderness is an essential skill that can help you find your way back to camp or reach a specific destination. Here are the basic steps for using a compass:
- Hold the compass level and steady, away from any metal objects that could interfere with its magnetic reading.
- Rotate the compass housing so the north arrow lines up with the magnetic needle.
- Determine the direction you want to go and turn your body until the compass needle is pointing in that direction.
- Follow the compass’s direction, using terrain features or landmarks to guide you if possible.
- Periodically check your compass to ensure you’re still heading in the right direction.
It’s important to note that a compass is just one tool for navigation and should be used in conjunction with other techniques, such as map reading and terrain observation.
Additionally, practicing using a compass before relying on it in a real-life situation is essential. Finding an orienteering course near you is a great way to do this. Some organizations or local parks may have a course already set up and ready for you to use.
All About Reading Maps – Navigation and Map Reading
Maps are essential tools for navigation and can provide crucial information for survival in the wilderness. Here are some of the basic features of a map and how to read them:
- Scale: The scale of a map indicates the ratio between the distance on the map and the actual distance on the ground. For example, a map with a scale of 1:50,000 means that one unit of measurement on the map (e.g., an inch) represents 50,000 units of measurement on the ground (e.g., 50,000 inches or about 0.8 miles).
- Legend: The legend or key of a map provides information about the symbols and colors used on the map. It may include symbols for natural features like rivers and mountains and man-made features like roads and buildings.
- Contour Lines: Contour lines are a series of lines that connect points of equal elevation on a map. By reading contour lines, you can determine the shape and steepness of the terrain.
- Grid Lines: Grid lines are a series of lines that divide the map into a grid. They are used to locate specific points on the map and can be used with a compass for navigation.
- Compass Rose: The compass rose is a diagram on the map that indicates the direction of north, south, east, and west.
To read a map, start by familiarizing yourself with the map’s scale and legend. Look for natural and man-made features on the map and compare them to the legend to identify what they represent. Use contour lines to determine the shape and steepness of the terrain, and grid lines and a compass rose to determine your location and navigate to a specific destination. It’s essential to practice reading maps and using them with other navigation techniques like compasses to developing a comprehensive understanding of wilderness navigation.
The Importance of Taking Note of Landmarks – Navigation and Map Reading
Landmarks are natural or man-made features in the wilderness that can be used as reference points for navigation. These can include mountains, rivers, lakes, rock formations, trees, or even man-made structures such as buildings or power lines.
Taking note of landmarks is an essential part of wilderness navigation, as it can help you stay oriented and find your way back to your starting point or destination.
When traveling in the wilderness, it is easy to become disoriented and lose your bearings, especially in unfamiliar terrain or low-visibility conditions such as fog or heavy rain. By noting landmarks along your route, you can use them as reference points to help you stay on course. For example, if you know that a particular mountain is to the east of your campsite, you can use that information to track which direction you are heading and make adjustments to your route if necessary.
In addition to helping with navigation, landmarks can provide important clues about your surroundings. For example, a river can indicate the presence of water and a potential source of drinking water, while a stand of trees can provide shelter from the wind and sun. By being aware of these landmarks and what they signify, you can better decide where to camp, where to find food and water, and how to stay safe in the wilderness.
Taking note of landmarks is integral to wilderness survival and can help you stay oriented, make better decisions, and stay safe in the wilderness.
2. Building a Fire – Wilderness Survival 101
Building a fire is an essential wilderness survival skill because it can mean the difference between life and death in a survival situation. Fire serves many purposes, including providing warmth, light, and a way to cook food and purify water. It can also signal for help, ward off dangerous animals, and boost morale.
Starting a fire using matches or a lighter may not always be possible in a wilderness survival situation. Therefore, knowing how to create a fire using natural materials such as dry grass, sticks, and stones is crucial. This skill requires knowledge of the types of wood and tinder that burn well and techniques for creating friction between two materials to generate a spark.
Additionally, building a fire safely and responsibly is essential to prevent accidental forest fires. This involves selecting a safe spot for the fire, clearing any flammable materials, and ensuring the fire is fully extinguished before leaving the area.
Knowing how to build a fire, with or without matches/lighter, is a crucial skill for any wilderness camper or hiker, as it can increase the chances of survival in an emergency.
Making a Fire Without Matches or a Lighter – Building a Fire
Making a fire without matches or a lighter can seem daunting, but it is possible with the proper knowledge and skills. Here are some methods to make a fire without matches or a lighter:
- Fire Plow Method: This method requires a flat wooden board and stick. Cut a groove in the board and rub the stick up and down the groove until the friction ignites the wood dust.
- Hand Drill Method: This method requires a wooden board, a wooden stick, and some tinder. Place the tinder under the board, then rotate the stick between your hands, creating friction and heat, eventually igniting the tinder.
- Bow Drill Method: This method is similar to the hand drill method but uses a bow and string to create the friction needed to ignite the tinder. The bow spins the wooden stick, which is pressed into a wooden board, creating heat and igniting the tinder.
It’s important to remember that making a fire without matches or a lighter requires a lot of practice and patience. Ensure you have all the necessary materials before starting a fire, and always be mindful of fire safety.
Youtube Tutorial: How to Make Fire Without Matches or Lighter
Campfire Materials – Building a Fire
To make a fire, you’ll need some basic materials, such as
- Tinder: This is the material that will ignite with a spark and will start your fire. Dry leaves, twigs, and dry grass make excellent tinder.
- Kindling: This material will catch fire from the tinder and create a small flame. Small sticks, twigs, and small dry branches make excellent kindling.
- Fuel: Once the kindling burns, you need larger fuel to keep the fire going. Dry logs or branches are ideal for this purpose.
You should always check local regulations before starting a campfire, as some areas may have fire bans in place due to dry conditions or other factors. Also, always keep a water source nearby if the fire gets out of control.
How to Select a Safe Spot for a Campfire – Building a Fire
Selecting a safe spot for a campfire is crucial for ensuring the safety of yourself, your camping companions, and the wilderness. When choosing a site for your fire, consider the following:
- Check for Fire Regulations: Before selecting a campfire spot, check for any fire regulations in your camping area. Some sites may have fire restrictions or bans due to dry weather conditions, so knowing these rules is essential.
- Look for a Designated Fire Ring: If the campsite has a designated fire ring or fire pit, it is best to use it rather than create a new one. These areas have been designed explicitly for campfires and are usually located in safe spots away from surrounding vegetation.
- Choose an Open Area: Select a spot that is clear of overhanging branches, dry grass, or debris that could easily catch fire. Avoid building a fire under trees or enclosed spaces, as this can lead to a dangerous situation.
- Keep a Safe Distance from Other Objects: When building a fire, ensure it is at least 15 feet away from tents, vehicles, and other flammable objects.
- Consider Wind Direction: Pay attention to the direction of the wind, and position your fire accordingly. This will prevent sparks and embers from blowing into nearby vegetation or flammable objects.
By selecting a safe spot for your campfire, you can enjoy the warmth and comfort of a fire while minimizing the risk of starting a dangerous wildfire.
Building a Successful Campfire – Building a Fire
The best campfire style to build is the teepee-style fire, named after the Native American tent-like structure. This fire style allows for optimal airflow, which is essential to keep the fire burning strong. The teepee-style fire is also easy to build, making it an excellent option for novice and experienced campers.
To build a teepee-style fire, start with a small pile of kindling in the center of the fire pit. Make sure the kindling is dry and thin, as this will allow it to catch fire easily. Then, arrange small sticks or twigs in a teepee shape around the kindling, leaving a small opening on one side for airflow.
Once the kindling and small sticks are in place, light the kindling with matches or a lighter. As the fire catches, gradually add larger sticks to the teepee structure. Ensure to continue building the teepee shape, leaving plenty of space for airflow.
It’s important to note that building a campfire can be dangerous, and it is essential to follow fire safety guidelines. Always check with local authorities for fire restrictions, and never leave a fire unattended. Make sure to fully extinguish the fire before leaving the campsite, using water or dirt to put it out completely.
Youtube Tutorial: Teepee Fire
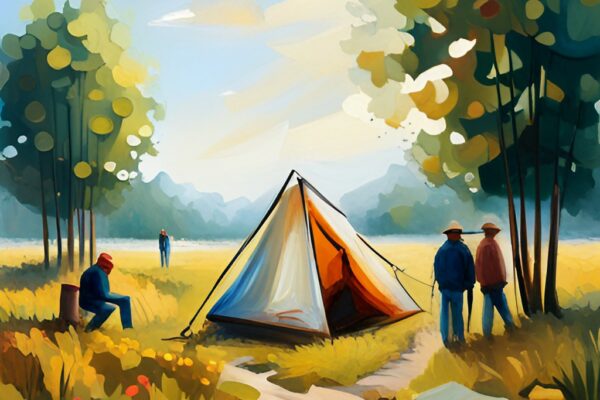
3. Shelter Building – Wilderness Survival 101
Shelter building is a critical wilderness survival skill because it provides protection from the elements and helps to regulate body temperature. Exposure to extreme temperatures, such as heat, cold, wind, or rain, can lead to hypothermia, heat exhaustion, or even death. The shelter can protect dangerous wildlife and insects and offer security and comfort in an unfamiliar environment.
Building a shelter with whatever materials are available may be necessary for survival. Knowing how to construct a shelter using natural materials such as branches, leaves, and moss can significantly increase one’s chances of survival. It is essential to understand the principles of shelter building, such as choosing the right location, selecting appropriate materials, and constructing a sturdy structure that provides adequate insulation and protection.
Additionally, knowing how to build different types of shelters can be helpful depending on the environment and available resources. For example, a lean-to shelter may be appropriate in a forested area with plenty of fallen branches. At the same time, a debris hut may be more suitable in a room with limited natural resources.
How to Make a Lean-To Shelter – Shelter Building:
A lean-to shelter is a simple, effective, easy-to-make wilderness shelter. Here are the steps to make one:
- Find a Good Location: Look for a spot sheltered from the wind and preferably close to a water source. You can use trees or rocks as a natural shelter.
- Collect Materials: Collect long, straight branches to use as the main frame of your shelter. You will also need shorter sticks to weave through the main components, leaves, pine needles, and other natural materials for insulation.
- Create the Frame: Place one end of a long branch against a tree or other sturdy object, with the other end on the ground. Repeat this with several more branches parallel to each other until you have the length you need for your shelter. Make sure to leave enough space for you to lie down comfortably.
- Add Cross Braces: Lay smaller branches across the main branches, perpendicular to them, and weave them through the main branches to create a stable frame.
- Insulate the Shelter: Add leaves, pine needles, or other natural materials between the cross braces to create insulation.
- Create a Door: Use additional branches to create a doorway on one end of the shelter, leaving enough space for you to crawl in and out.
- Test the Shelter: Lie down in the shelter to ensure it is comfortable and stable. Make any necessary adjustments before settling in for the night.
Always be mindful of your surroundings and the materials you use to build your shelter. Be sure to follow Leave No Trace principles and dismantle your shelter when you leave to minimize your impact on the environment.
Youtube Tutorial: Bushcraft: How to make a lean-to shelter from only natural materials – survival shelter
How to Make a Debris Shelter – Shelter Building
A debris shelter is a type of shelter built using natural materials found in the surrounding environment. It is a great option when you do not have any tarpaulin or other gear to construct a shelter. Here’s how to make a debris shelter:
- Find a sturdy tree with a fork in its branches. This will be the primary support for your shelter.
- Collect branches, leaves, grass, and other natural materials. Make sure to gather a lot of debris, as you must create several layers for insulation and protection from the elements.
- Lean branches against the forked tree to create a frame for your shelter. Make sure to leave enough space to fit comfortably inside.
- Begin layering the debris over the frame, starting with large branches on the bottom and then smaller branches and twigs on top. Keep adding layers until the shelter is thick and sturdy enough to prevent rain and wind.
- Once you have finished building your shelter, cover the ground with debris to provide insulation from the cold ground.
Remember to test your shelter before spending the night in it. Make sure it is sturdy and that there are no leaks or drafts. If necessary, make adjustments to improve its performance.
Youtube Tutorial: Survival Skills – Debris Shelter – Earth School
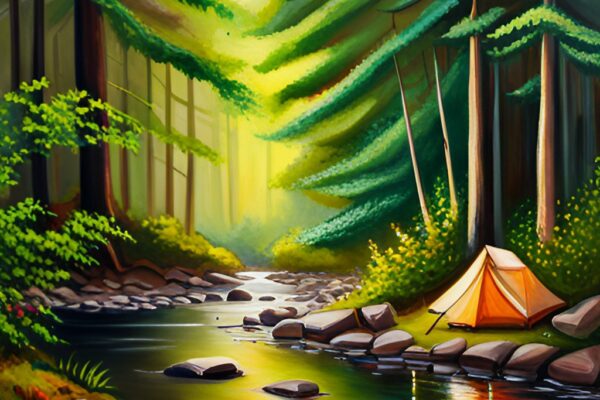
4. Finding and Purifying Water – Wilderness Survival 101
Finding and purifying water is an essential wilderness survival skill because humans cannot survive without water for more than a few days. Water sources in the wilderness may not be readily available or contaminated with harmful bacteria, viruses, and parasites that can cause illness or even death. As a result, it’s crucial to learn how to find and purify water in the wilderness to stay hydrated and healthy.
How to Find Water – Finding and Purifying Water
Finding water in the wilderness can be challenging, but there are several ways to increase your chances of success. Here are some methods to find water:
- Look for Signs of Water Sources: Look for signs such as vegetation, animal tracks, or insects, which may indicate a water source is nearby. Follow any streams or rivers, as these are good water sources.
- Use Topographical Maps: Look for features such as canyons, valleys, or depressions in the ground, which are often good indicators of where water can be found.
- Dig for Water: Digging into moist soil or sand can often yield water, especially near streams or rivers.
- Collect Dew: You can collect dew using a cloth or absorbent material and wring it into a container.
How to Purify the Water – Finding and Purifying Water
Once you have found a water source, it is vital to purify the water to make it safe for drinking. Here are some methods to purify water:
- Boiling: Water for at least 5 minutes will kill harmful bacteria and viruses.
- Filtration: A portable water filter can effectively remove harmful particles from water.
- Chemical Treatment: Chemical tablets or drops can disinfect water and make it safe for drinking. Follow the instructions on the product label.
- Solar Disinfection: Fill a clear container with water and leave it in direct sunlight for at least 6 hours. This method can effectively kill harmful bacteria and viruses.
5. Identifying Edible Plants and Berries – Wilderness Survival 101
Identifying edible plants and berries is an essential wilderness survival skill because it enables a camper to find food sources in the wild. In the wilderness, you may not have access to your usual food sources, and thus, knowing which plants and berries are safe to eat can be a lifesaver. This knowledge allows you to supplement your food supplies and avoid starvation. Not all plants and berries are safe to eat; some can be toxic, so learning to identify the right ones is critical.
Additionally, identifying edible plants and berries is an essential skill for those living off the land sustainably, as it allows them to forage for food rather than relying on hunting or fishing.
How to Learn About the Edible Plants Near You – Identifying Edible Plants and Berries
When identifying edible plants and berries in the wilderness, it is crucial to have the proper knowledge and training to do so safely. Foraging is a skill that has been passed down through generations in many areas, and it can take a long time to master.
Here are some ways to learn what plants and berries are safe to eat:
- Take a Class: Many community and outdoor education centers offer classes on wild edibles. These classes are taught by experts in the field who can teach you what to look for and how to identify safe plants and berries.
- Use Field Guides: Many field guides provide detailed information on wild edibles. These guides often include pictures, descriptions, and details on the plants’ locations.
- Find a Mentor: If you know someone experienced in identifying wild edibles, consider asking them to show you the ropes. Having a mentor can be extremely helpful in learning what to look for and how to harvest and prepare wild plants and berries safely.
- Attend a Workshop: Many wilderness schools and outdoor organizations offer workshops on wild edibles. These workshops are a great way to learn hands-on, often including foraging walks and cooking demonstrations.
- Do Your Research: The internet can be valuable for learning about wild edibles. However, ensuring that the information you are reading is accurate and reliable is vital. Stick to reputable sources and cross-reference your findings with multiple sources before consuming wild plants or berries.
6. Fishing and Hunting for Food – Wilderness Survival 101
Fishing and hunting for food are critical wilderness survival skills because they provide protein and other essential nutrients that may not be readily available in plant-based sources. When lost or stranded in the wilderness, finding and catching food to sustain oneself until rescue or help arrives is crucial.
Fishing can be an excellent source of protein and other essential nutrients. Rivers, streams, and lakes can be home to fish such as trout, bass, and catfish, depending on the region. One needs a fishing line, hooks, and bait to catch fish. In some cases, a fishing net or a fishing spear may also be helpful.
Hunting is also a crucial skill for wilderness survival. It involves tracking and capturing wild animals like deer, rabbits, and squirrels. Hunting requires specialized equipment such as a rifle or bow and arrows, and one must also know how to track animals and set traps or snares.
While fishing and hunting are excellent skills in the wilderness, it is essential to remember that wildlife is a precious resource and should be treated respectfully.
How to Learn How to Fish – Fishing and Hunting for Food
There are several ways to learn how to fish:
- Take a Fishing Class: Many state fish and wildlife agencies, outdoor organizations, and fishing clubs offer classes on fishing. These classes teach you the basics of fishing, including equipment selection, casting, and fish identification.
- Watch Online Tutorials: Many fishing enthusiasts post instructional videos on YouTube or other video-sharing platforms. These videos can provide tips on different fishing types and how to catch specific fish species.
- Read Books: Many books on fishing can help you learn the basics of the sport. Look for books that cover topics such as gear selection, knots, casting, and fish behavior.
- Ask a Friend or Family Member: If you have friends or family members who are experienced anglers, ask them to teach you. This is a great way to learn firsthand from someone who knows what they’re doing.
- Hire a Fishing Guide: Fishing guides are experienced anglers who can take you to prime fishing spots and provide instructions on fishing. While this can be a more expensive option, it can be a great way to learn quickly and efficiently.
How to Learn How to Hunt – Fishing and Hunting for Food
Depending on your location and available resources, there are several ways to learn how to hunt. Here are some ways to get started:
- Hunter Education Courses: Many states offer hunter education courses designed to teach people the basics of hunting and wildlife management. These courses cover firearms safety, hunting ethics, and hunting techniques.
- Mentoring: If you know someone who is an experienced hunter, ask them to teach you. Experienced hunters are often happy to share their knowledge and pass on their skills to new hunters.
- Online Resources: Many online resources can help you learn how to hunt. Hunting forums and blogs provide information, tips, videos, and podcasts that offer step-by-step instructions.
- Hunting Books: There are many books available on hunting, covering topics such as hunting techniques, wildlife biology, and firearms safety. These books can provide valuable information and insights into the sport.
- Hunting Workshops: Many hunting organizations and conservation groups offer workshops and seminars on various aspects of hunting, from field dressing to tracking to calling techniques.
Remember, it is essential always to follow local hunting regulations and to practice safe hunting practices.
7. Basic First Aid – Wilderness Survival 101
Basic first aid is a crucial wilderness survival skill, as injuries and accidents can happen in any outdoor setting. Knowing basic first aid can mean the difference between life and death in emergencies. It involves providing immediate care for injuries or illnesses, stabilizing the victim’s condition, and arranging medical assistance.
Medical help may not be immediately available in the wilderness, making it even more essential to have basic first aid skills. Common injuries in the wilderness include cuts, burns, sprains, fractures, hypothermia, and dehydration. Recognizing and responding to these conditions can significantly increase the chances of survival.
Moreover, learning first aid benefits not only oneself but also others. In an emergency, one can offer aid to a fellow hiker or camper in distress. This can save lives and prevent further complications. Thus, basic first aid is an essential wilderness survival skill that every camper should know.
The Essential Aspects of First Aid – Basic First Aid
Basic first aid includes a set of skills and procedures that can help stabilize and treat common injuries and illnesses that may occur in the wilderness.
Some of the essential aspects of basic first aid include:
- Assessment: Assessing the situation and the person’s condition is the first step in providing first aid. It involves checking for any life-threatening injuries and identifying the signs and symptoms of the injury or illness.
- CPR and AED: Cardiopulmonary resuscitation (CPR) and the use of an automated external defibrillator (AED) are essential skills that can help save a life in case of cardiac arrest.
- Wound Care: Knowing how to clean and dress wounds can prevent infection and promote healing.
- Splinting: Learning to splint a broken or fractured bone can provide temporary support until professional medical help is available.
- Control Bleeding: Knowing how to control bleeding by applying direct pressure, using a tourniquet, or elevating the affected limb can help prevent shock and further complications.
- Allergic Reactions: Knowing how to recognize and treat an allergic reaction, including administering an epinephrine auto-injector (EpiPen), can save a life in case of severe anaphylaxis.
- Heat and Cold-Related Emergencies: Knowing how to recognize and treat heat exhaustion, heat stroke, hypothermia, and frostbite can prevent serious complications.
Basic first aid skills can help stabilize a person’s condition, prevent further complications, and provide comfort until professional medical help is available.
Some Ways to Learn First Aid – Basic First Aid
There are several ways to learn how to perform basic first aid for wilderness survival. Some of them are:
- Take a First Aid Course: A first aid course is the most comprehensive way to learn basic first aid. You can find courses online or in person through organizations like the Red Cross or the National Outdoor Leadership School (NOLS). These courses typically cover topics like CPR, wound care, and treating burns, bites, and fractures.
- Read Books: There are several books available that cover basic first aid for wilderness survival. Some popular titles include “Wilderness First Aid: A Waterproof Pocket Guide to Common Sense Self Care,” “Medicine for the Outdoors,” and “NOLS Wilderness Medicine.”
- Watch Online Tutorials: There are many online tutorials available that cover basic first aid skills. Websites like YouTube offer various videos on CPR, wound care, and treating burns and fractures.
- Practice with a First Aid Kit: Another way to learn basic first aid is by practicing with a kit. You can purchase a pre-made kit or assemble your own. Use the items in the kit to practice treating various injuries and illnesses.
- Take a Wilderness Medicine Course: If you plan to spend much time in the wilderness, consider taking a wilderness medicine course. These courses are more comprehensive than introductory first aid courses, covering altitude sickness, hypothermia, and dehydration. Some popular wilderness medicine courses include NOLS Wilderness Medicine and SOLO Wilderness Medicine.
8. Understanding Weather Patterns and Forecasts – Wilderness Survival 101
Understanding weather patterns and forecasts is a necessary wilderness survival skill because weather conditions can significantly impact a camper’s health and safety. Sudden weather changes, such as rain, snow, or extreme temperatures, can quickly turn a fun camping trip into a dangerous situation. Accurately reading weather patterns and forecasts can help campers plan ahead and prepare for any potential weather-related hazards.
For example, if a camper knows that a snowstorm is coming, they can prepare by bringing extra blankets, warm clothing, and waterproof gear. If a camper knows that a heatwave is coming, they can plan their activities around the hottest parts of the day and bring plenty of water to stay hydrated.
Understanding weather patterns and forecasts can help campers avoid dangerous situations like thunderstorms or flash floods. With this knowledge, campers can decide when to seek shelter or evacuate the area.
Overall, understanding weather patterns and forecasts is essential for anyone planning to spend time in the wilderness, as it can help ensure their safety and enjoyment of the outdoors.
Checking the Forecast While Out Camping – Understanding Weather Patterns and Forecasts
It is recommended to check the weather forecast multiple times a day while out camping, especially if you plan to be in the wilderness for an extended period of time. Weather can be unpredictable, and checking the forecast frequently can help you plan accordingly and be prepared for any changes. It is also essential to watch the sky and look for any signs of impending weather changes, such as dark clouds, strong winds, or sudden temperature drops.
Weather Patterns that Signify Something is Wrong – Understanding Weather Patterns and Forecasts
Several weather patterns can signify something is going wrong, especially in the wilderness. Here are a few examples:
- Dark Clouds: Dark clouds, especially if they are moving quickly, can indicate an incoming storm. Taking shelter and preparing for potential high winds and heavy rainfall is essential.
- Sudden Changes in Temperature: Sudden temperature drops can indicate that a cold front is moving in, bringing harsh weather conditions such as snow and ice.
- Strong Winds: Strong winds can be a sign of a coming storm or make navigating the wilderness difficult.
- Rapidly Falling Barometric Pressure: Rapidly falling barometric pressure can indicate an incoming storm, which may bring high winds, heavy rainfall, and potentially dangerous conditions.
- Fog or Mist: Fog or mist can limit visibility, making it challenging to navigate the wilderness. It’s essential to slow down and proceed with caution in these conditions.
9. Knot Tying – Wilderness Survival 101
Knot tying is a critical wilderness survival skill because it is essential for securing shelter, building traps, and creating tools for survival. Knots can tie up tarps for shelter, secure ropes for climbing or rappelling, and create nets for fishing or trapping game. Tying knots can make the difference between a successful shelter and one that collapses in the middle of the night. Knots can also be used to create emergency tools, such as slings or tourniquets, when medical help is not immediately available.
Furthermore, knowing how to tie knots properly can also prevent accidents and injuries. For example, a poorly tied knot can cause a climbing rope to slip or come loose, resulting in a fall. It is essential to understand each type of knot’s strengths and limitations and know when and where to use them appropriately. In short, knot-tying is a crucial wilderness survival skill that can make a significant difference in a survival situation.
The three most essential knots to learn are the square knot, the bowline knot, and the taut-line hitch.
The Square Knot – Knot Tying
The square knot is used to join two ropes of equal diameter and is commonly used for securing loads and tying packages. It is easy to tie and untie, and it is reliable when the ropes are of equal size.
Youtube Tutorial: How To Tie A Square Knot (Step-By-Step Tutorial)
The Bowline Knot – Knot Tying
The bowline knot creates a secure loop at the end of a rope that does not slip or jam. It is often used in rescue situations and is known as the king of knots because of its versatility and strength.
Youtube Tutorial: How To Tie A Bowline Knot (Step-By-Step Tutorial)
The Taut-Line Hitch-Knot Tying
The taut-line hitch is a sliding knot that adjusts a line’s tension. It helps secure tents and tarps and can be adjusted easily, even under tension.
Youtube Tutorial: Knots – How to tie a Taut-Line Hitch.
10. Basic Tool Use (Knife, Axe, Saw, etc.) – Wilderness Survival 101
Basic tool use, including the use of a knife, axe, saw, and other tools, is an integral wilderness survival skill because it is essential for various activities such as shelter building, fire building, hunting, and preparing food. With these tools, a camper can create shelter, build a fire, hunt and process food, cut rope, and make other necessary repairs.
A knife is one of the most important tools to have when camping, as it can be used for a variety of tasks, such as cutting rope, preparing food, and creating tinder for starting a fire. An axe is also essential for chopping wood for a fire or building a shelter. A saw can be used to cut branches and logs for firewood or shelter building.
However, using these tools also comes with risks, and proper safety measures should be taken. A camper should always use a sharp blade, handle tools carefully, and never leave tools lying around. Additionally, proper training and practice in using these tools can prevent accidents and increase efficiency in wilderness survival situations.
Knives – Basic Tool Use
A knife is a versatile tool and is essential in a wilderness setting for tasks like preparing food, cutting rope or cord, carving wood, and making shelter.
Here are some steps on how to use a knife for some of these tasks:
- Preparing Food: Hold the food with one hand, and with the other hand, use the knife to cut through it. Be sure to keep your fingers away from the blade and cut away from your body.
- Cutting Rope or Cord: Hold the rope or cord with one hand and use the knife to cut it with a sawing motion. Be careful not to cut yourself, and keep the blade away from your body.
- Carving Wood: Hold the wood with one hand and use the knife to make small cuts in the wood. Start with shallow cuts and gradually deepen them until you achieve the desired shape. Use a whittling motion to shave off small pieces of wood.
Remember to always use your knife with caution, keep it sharp, and store it safely when not in use. Additionally, it’s crucial to follow Leave No Trace principles and avoid damaging plants or trees in the process.
Axes – Basic Tool Use
An axe is a versatile tool in a wilderness setting and is commonly used for chopping wood, building shelter, and clearing brush. To use an axe, start by selecting the proper axe for the job. A felling axe is ideal for chopping down trees, while a splitting axe is designed for splitting wood.
Next, it’s important to ensure the axe is sharp and properly maintained. Dull axes are more dangerous to use and can cause accidents. Before using the axe, inspect the handle for any cracks or damage. If the handle is damaged, replace it before using the axe.
When using the axe, stand with your feet shoulder-width apart and swing the axe using both hands, keeping your elbows close to your body. Aim for the center of the wood, and swing with a smooth, fluid motion. It’s essential to keep your eyes on the target and avoid swinging too hard or too fast.
When splitting wood, position the log on a chopping block and aim for the center of the log. Use a wedge to split the wood into smaller pieces, and always wear protective gloves and eyewear when using an axe. When not in use, store the axe in a dry, cool place to prevent rusting and damage.
Saws – Basic Tool Use
A saw is a tool used for cutting wood or other materials in a wilderness setting. It is used to create structures or to gather firewood for a campfire.
Here are some directions on how to use a saw in a wilderness setting:
- Choose the Right Saw: Select a saw that is appropriate for the job at hand. A folding saw is a good option for backpacking and camping trips as it is lightweight and easy to carry.
- Secure the Material: If you are cutting a log or branch, secure it with a clamp or wedge to prevent it from rolling or moving while you saw.
- Start the Cut: Place the saw blade on the material and use your other hand to hold the saw handle. Apply pressure to the saw blade and start sawing with a back-and-forth motion.
- Maintain a Steady Pace: Use long, steady strokes to saw through the material. Avoid using too much pressure or sawing too quickly, as this can cause the saw to bind or break.
- Use the Full Length of the Blade: When sawing, use the full length of the saw blade. This will help you cut more efficiently and prevent the blade from dulling too quickly.
- Use Proper Form: Stand with your feet shoulder-width apart and keep your back straight while sawing. This will help you maintain balance and prevent fatigue.
- Keep the Saw Clean: After using the saw, wipe it down with a cloth to remove any debris. This will help prevent rust and extend the life of the saw.
By following these steps, you can safely and effectively use a saw in a wilderness setting.
11. Crossing Bodies of Water Safely – Wilderness Survival 101
Crossing bodies of water safely is an integral wilderness survival skill because it can be a dangerous and challenging task. Whether you’re crossing a river, stream, or lake, the water can be deep, cold, and moving quickly. If you’re not careful, you could be swept away or submerged, leading to serious injury or even death.
There are several hazards to be aware of when crossing bodies of water, including strong currents, slippery rocks, deep pools, and underwater hazards such as logs and rocks. In addition, water temperature can be very cold, leading to hypothermia if you become wet.
Therefore, learning how to safely and effectively cross bodies of water is crucial. This includes knowing how to assess the water’s depth and current, selecting the best crossing location, wearing appropriate clothing and gear, using proper crossing techniques, and having a backup plan in case of an emergency. With these skills, you can minimize the risks associated with crossing bodies of water and ensure that you and your companions stay safe while exploring the wilderness.
How to Cross Water – Crossing Bodies of Water Safely
Here are some steps for safely crossing water in a wilderness setting:
- Assess the Water: Before crossing, take the time to assess the depth and speed of the water. Consider finding an alternative route if the water is too deep or moving too fast.
- Unbuckle Your Backpack: If you’re carrying a backpack, unbuckle it and loosen any straps. This will allow you to easily get out of the backpack if you fall in the water.
- Remove Unnecessary Items: Remove any unnecessary items from your pockets or pack that could get damaged or become a hazard in the water.
- Choose a Crossing Point: Look for a shallow, calm section of the water to cross. Look for a location where the water is wide, as narrower sections of water are generally deeper and more swift.
- Test the Water: Test the depth and current of the water by using a long stick or trekking pole. Consider finding an alternative route if you feel the current is too strong or the water is too deep.
- Cross as a Team: Cross with at least one other person, and hold hands or link arms to form a chain. This will help you maintain balance and provide support if someone starts to fall.
- Move Slowly and Deliberately: Take small, deliberate steps, and face upstream while crossing. This will help you maintain your balance and avoid being swept away by the current.
- Use Trekking Poles or a Walking Stick: If available, use trekking poles or a walking stick to help you maintain balance and find secure footing on slippery rocks or uneven surfaces.
- Stay Calm: If you fall in the water, try to stay calm. Don’t panic; try to swim to the shore or back to your group if possible.
Remember, crossing water can be dangerous, so always take the time to assess the situation and look for the safest crossing point. If you’re uncomfortable with the crossing, consider finding an alternative route or waiting for conditions to improve.
12. Understanding and Recognizing Hypothermia and Heat Exhaustion – Wilderness Survival 101
Understanding and recognizing hypothermia and heat exhaustion is a critical wilderness survival skill because knowing how to protect yourself from these potentially life-threatening conditions is essential.
Hypothermia occurs when the body loses heat faster than it can produce heat, causing a dangerously low body temperature. Heat exhaustion, on the other hand, occurs when the body overheats and becomes dehydrated, leading to symptoms such as dizziness, nausea, and fatigue.
Both of these conditions can be avoided with proper preparation and knowledge.
Hypothermia can be prevented by staying dry and warm, wearing appropriate clothing, and avoiding prolonged exposure to cold and wet conditions. Heat exhaustion can be prevented by staying hydrated, taking frequent breaks in the shade or cool areas, and wearing light and breathable clothing.
Signs of Hypothermia and What to Do – Understanding and Recognizing Hypothermia and Heat Exhaustion
Hypothermia occurs when the body loses heat faster than it can produce it, leading to a dangerously low body temperature. This can happen when a person is exposed to cold and wet conditions for an extended period of time. It is important to recognize the signs of hypothermia and take appropriate action to prevent it from becoming life-threatening.
The early signs of hypothermia include shivering, numbness, and confusion. As hypothermia progresses, the person may experience slurred speech, a slow heart rate, and shallow breathing. They may also become lethargic and unresponsive. In severe cases, hypothermia can lead to unconsciousness and death.
If you suspect someone has hypothermia, take the following steps:
- Move the Person to a Warm, Dry Place: Remove them from the cold and wet environment and get them to a sheltered area.
- Remove Wet Clothing: Wet clothing can further decrease the person’s body temperature, so remove any wet clothing and replace it with dry clothing or blankets.
- Warm the Person: Warm the person gradually by wrapping them in blankets, using a sleeping bag, or using your own body heat. Do not apply direct heat sources, such as hot water bottles or heating pads, as this can cause burns.
- Provide Warm Drinks: Offer warm, non-alcoholic beverages to help raise the person’s body temperature.
- Seek Medical Attention: Hypothermia can be life-threatening, so seek medical attention as soon as possible.
Preventing hypothermia is critical to staying safe in cold and wet environments. Be sure to wear appropriate clothing and gear, such as warm, dry clothing layers, waterproof jackets and pants, and insulated boots. Avoid getting wet, and stay well-fed and hydrated to help maintain body temperature.
Signs of Heat Exhaustion and What to Do – Understanding and Recognizing Hypothermia and Heat Exhaustion
Heat exhaustion is a potentially serious condition that can occur in hot and humid environments. It happens when the body overheats and can no longer cool itself effectively.
The signs of heat exhaustion include:
- Heavy Sweating
- Weakness or Fatigue
- Dizziness or Fainting
- Headache
- Nausea or Vomiting
- Muscle Cramps
- Cool, Clammy Skin
- Rapid Heartbeat
- Dark Urine
If you or someone else is experiencing these symptoms, it is crucial to take action immediately.
Here are some steps you can take:
- Move to a Cool and Shady Area: If possible, move to an air-conditioned room or a shaded area. Remove any unnecessary clothing to help cool the body.
- Hydrate: Drink plenty of cool water or a sports drink that contains electrolytes. Avoid alcohol, caffeine, or sugary drinks.
- Rest: Sit or lie down and rest to help your body recover.
- Cool the Body: Use cool, damp towels or take a cool shower or bath to help lower the body temperature.
- Seek Medical Attention: If symptoms worsen or last longer than an hour, seek medical attention immediately. In severe cases, heat exhaustion can progress to heatstroke, a life-threatening condition that requires emergency medical attention.
It is important to prevent heat exhaustion by staying hydrated, taking breaks in cool and shaded areas, wearing lightweight and loose-fitting clothing, and avoiding strenuous activities during the hottest parts of the day.
Conclusion – Wilderness Survival 101
Whether you are an experienced outdoorsman or a novice, it is important to learn and master these 12 essential survival skills.
Knowing how to navigate, build a fire, find water, and perform basic first aid can mean the difference between life and death in the wilderness. Understanding weather patterns and learning how to fish and hunt are also vital skills to have. With practice and preparation, you can be confident that you are ready for anything the great outdoors may throw your way.
So, pack your bags, grab your gear, and head out to the wilderness – but make sure you’re prepared with these essential survival skills.
Frequently Asked Questions – Wilderness Survival 101
1. Why is Basic First Aid an Integral Wilderness Survival Skill? – FAQs
Basic first aid can help you address injuries and illnesses that may occur during a camping trip, providing immediate care until professional medical help arrives. It can also help prevent minor injuries from becoming major problems.
2. What are Some Ways to Learn How to Fish? – FAQs
You can learn how to fish by taking classes or workshops, reading instructional books or online resources, watching videos or TV shows about fishing, or simply practicing on your own with guidance from experienced fishermen.
3. What Materials Do You Need for a Campfire? – FAQs
To build a campfire, you’ll need a fire ring or pit, tinder (such as small dry twigs or bark), kindling (such as larger sticks or small branches), and firewood (such as logs or split wood). You’ll also need matches, a lighter, and a shovel or other tool to put out the fire when finished.
4. Why is it Important to note landmarks when you are in the Wilderness? – FAQs
Landmarks can help you navigate through the wilderness and find your way back to camp or safety. They can also help you locate food, water, or shelter sources, and provide a reference point to help you stay oriented.
5. What are Some Weather Patterns that Signify Something is Going Wrong? – FAQs
Some weather patterns that can indicate potential problems include sudden changes in temperature or wind speed, rapidly approaching storm clouds, thunder and lightning, or other signs of severe weather such as hail, heavy rain, or snow. Additionally, if you notice that animals or insects are behaving differently than usual, it could be a sign of impending weather changes.