Below are our summary and tips on the ten things you need for camping.
Camping is fun, exciting, and a great way to reconnect with nature. Not to mention, for many, it’s a cost-effective way to travel.
But packing for a camping trip can be overwhelming. There are so many things to bring. This is especially true if you are new to camping.
There are many checklists on the internet, but what do you really need?
So in this article, we boil it down to the 10 essential items for camping:
- Tent
- Sleeping gear
- Lighting and electricity
- Clothing
- Pocket knife
- Fire starter
- Food
- Water
- Navigation
- First aid kit
Let’s get started.
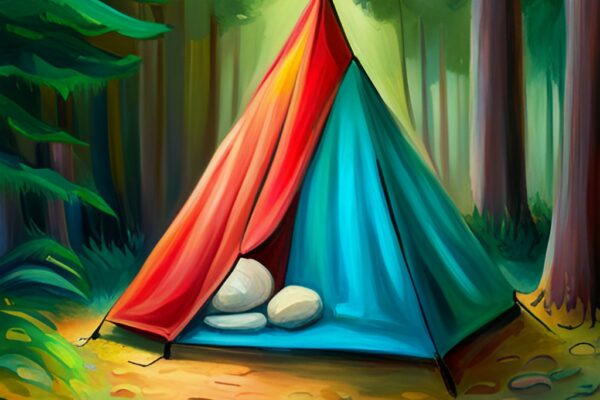
Tent
A tent is probably the first thing that comes to your mind when you think about camping. And it’s what protects you from the elements.
There are several things you need to properly set up your tent:
- Inner tent, usually comes with mesh
- Rainfly
- Poles
- Stakes (replace with high-quality ones) and mallet
- Tarp
- Guylines
Let’s dive a little deeper into each of these.
If you don’t have a tent ready for your next trip or are new to camping, you will have sooo many options for a new tent.
Besides your traditional dome tents with sloping walls, you can get a cabin tent with near-vertical walls for maximum comfort. Or you can have an instant tent that goes up in seconds.
Anyways, the point is that it’s worth spending some time to look for a great shelter that meets all your needs. There’s something for everyone in today’s market. That’s why we’ve created this super comprehensive guide on how to choose the perfect tent for you.
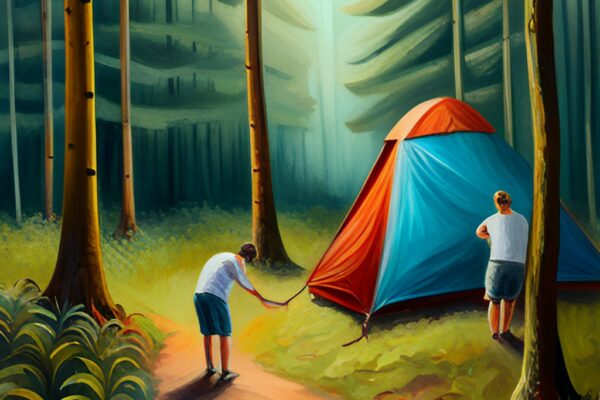
So you’ve got your tent now. Are you all set? Nope!
I can tell you from experience that most tents come with poor-quality stakes. They bend easily when you apply pressure to stake them into the ground. And the worst part is that they come out easily too.
The solution is simple, though. Just buy some high quality stakes, like these included in the Coleman tent kit.
Speaking of the tent kit, it also comes with a mallet, another necessity. You need it to actually push the stakes into the ground. I’ve tried using my bare hands and feet before, and it was not pleasant.
Check out our article on how to set up a tent if you want to learn more about the general setup process. It walks you through step by step from laying down the foundation to extending the guylines. There are also some neat tricks and hacks that will save you time and give you peace of mind in rough weather.
We highly recommend that you get a tarp if you plan on using your tent for more than one season.
Though not absolutely necessary, a tarp really helps to protect your tent floor against wear and tear. Days after days of rubbing against a rough surface will take a toll on it.
And what’s the consequence of a tent floor with holes?
Not only would annoying critters get in, rainwater pooling on the ground would also seep in and soak you stuff! Waking up wet certainly isn’t pleasant.
Ok, I think that’s all we have to say for bringing your tent. Now moving on to sleeping gear.
Sleeping Gear
There’s nothing more important than a good night’s sleep when you have a whole day of adventures ahead of you. So let’s get this nailed down.
Sleeping Pad
This is what you will sleep on. While it may be tempting to only bring a sleeping bag, we think a sleeping pad is essential.
Not only does it cushion your back against the hard, and possibly rocky, ground, it also provides great insulation. Believe it or not, you actually lose much more body heat to the ground than to the air around you.
Speaking of insulation, it’s measured in R-value. I would say for summer camping trips, a R-value between 2 to 3 should be sufficient. But for fall or winter trips, go for one above 5.
There are many sleeping pads on the market, ranging from ones made from foam to those that need to be pumped up with air.
Foam pads are probably the most durable given there’s no risk of puncture or leakage. On the other end, air pads may leak, but they are a lot more portable when deflated. Many are quick and easy to inflate with a built-in foot pump.
Self-inflatable pads, those with open-cell foam that can be filled up with air, is a compromise between the two. As the name suggests, you don’t need to inflate them manually. It goes up by itself in a few minutes.
That being said, REI has a more comprehensive guide on choosing the best sleeping pad.
Sleeping Bag
This one is pretty self-explanatory. It’s like your quilt when camping to keep you warm and comfy.
Temperature rating is the most important metric to look at when getting a sleeping bag. It’s the lowest temperature at which the sleeping bag will keep you warm.
But truth be told, it’s theoretical and should not be taken at face value. It’s the temperature at which you could survive, certainly not thrive.
And keep in mind that manufacturers tend to inflate how well their product performs to boost sales. This is especially true of smaller brands who don’t do rigorous testing on their products.
So we recommend you get a sleeping bag rated for at least 20 F lower than the lowest night temperature at your campsite. This will keep you warm and toasty with a great night’s sleep. Super important when you have a whole day of outdoor activities planned!
And remember that the night temperature is a lot lower than the day temperature in many places. You may not have a sense of how cold it gets at a certain place if you’ve only been out during the day. So always check the weather forecast.
I’d say a pillow could be essential or completely optional depending on your sleeping habits. You can bring your pillow from home if you aren’t short on weight or space. But if you need more compact options, camping pillows are the way to go.
Sources of Lighting and Electricity
Keep in mind that at your campsite, there aren’t any switches to turn on the light or outlets to plug in your charger. Finding replacements for these is essential. Fortunately, there’s an abundance of options in today’s market.
Headlamp or Flashlight
A headlamp or flashlight is critical in making sure there’s portable light.
We believe a headlamp is the ideal choice given how lightweight and affordable it is. And most importantly, it frees up your hands, something a flashlight could not accomplish.
Whether you are reading at night, taking midnight bathroom breaks, or even cooking a late dinner, a headlamp has you covered.
A tactical flashlight may be more suitable if you need something more durable. Most are made with metal frames that are virtually indestructible.
Here are some tips to get the most out of your headlamp or flashlight:
- Know your battery levels before you go. Ideally you should have full batteries
- Bring some extra batteries
- Check that everything’s working properly before you go
Lantern
Want some ambient lighting for your campsite or something that lights up your entire tent? Then the lantern is essential for you.
Compared to headlamps or flashlights, a lantern is a stronger light source that’s either hangable or freestanding. It lights up a large surrounding area as opposed to only the few feet in front of you.
You could choose to only hang it in your tent or use it to light up your entire campsite. In the first case, a lantern with a lumen (a measure of brightness) under 100 would be sufficient. For the latter, look for one above 200. Or better yet, get one with adjustable lighting.
Some lanterns also double as a power bank for easy charging. Others can show changing colors while playing music. Time for some parties at your campsite!
If you have an electric lantern, be sure to fully charge it before you go or get new batteries. If you want to learn more, check out Backcountry’s guide on different types of lanterns.
Power Bank
We live in a digital age. And unless you are a hardcore survivalist, you would want to have your phone charged at all times. But the issue is that not all campsites come with outlets. And even if there were outlets in public areas like the office or restroom, they may be occupied.
That’s where a power bank comes in. You can charge on the go. Feel free to bring the one you already have, but we recommend that you get one with very high capacity (above 10000 mAH). This is because you likely need to charge your phone multiple times during a camping trip.
FYI, charging a dead iphone 12 to 100% takes about 3300 mAH. But don’t expect to actually get 3 charges if you get a power bank with 10000 mAH. You will get 2 charges instead since a power bank’s real-world capacity is about 2 / 3 of its theoretical capacity. You can read more about this here.
And some power banks work with solar power, so it will charge itself throughout the day while you enjoy the outdoors.
Weather-Appropriate Clothing and Rain Gear
Wearing the wrong clothes or being soaked can absolutely ruin your camping trip. Trust me, I’ve been there.
Rain Gear
If you are planning to do any type of hiking, this is a must. And an umbrella isn’t enough. Let me explain why.
Regardless of how meticulously you study the weather forecast, there’s always a chance that you get stuck in the rain on your hiking trails.
If you were near your home, you could go back and change. But not when camping. You are stuck with the few clothes you bring.
Not only are wet clothes uncomfortable, they are also heavier. This will make the trip more exhausting if you were a backpacker. And the consequences are even more severe in colder climates where hypothermia would be a concern.
Fortunately, there’s an easy solution. If you go on long hikes and camping trips pretty often, a lightweight rain jacket could be a great investment. The waterproof materials will keep the clothing underneath it dry even in heavy rain.
If you are on a tighter budget, a rain poncho is a great idea. Most will keep you dry all the way down to your knee and work well with large backpacks.
Clothing for the Day
Choosing the right clothing to wear during the day may seem pretty straightforward. Simply check the weather forecast and make sure the clothing is neither too cold or too warm.
But think twice before deciding to wear shorts or short-sleeved shirts. You will get more sunburns and potentially more bug bites. The key here is to strike the right balance between protection and staying cool.
Speaking of sun protection, don’t forget your sunscreen and sunglasses. For sunscreen, look for “broad spectrum” with a SPF above 30, ideally 50. These will protect you from both UVA and UVB rays. The ones in spray bottles also make reapplying easy.
For sunglasses, you would ideally get polarized ones. They reduce significantly more glare.
And also keep in mind the weight of your sunglasses, with TPU material being the lightest. As you are hiking long distances, a pair of heavy sunglasses can quickly become uncomfortable and trap sweat.
Clothing for the Night
But what should you wear when sleeping? This is a bit tricky. At night the temperature can be a lot lower than during the day, so we wouldn’t recommend you only bring your pajamas from home.
Instead, bring a few extra layers, such as a sweatshirt or a sweatpant, to make sure you stay warm. Fleece would be a great material for cases like this.
Also, bring some extra pairs of socks to keep your feet warm and to prevent the build-up of sweat.
Pocket Knife (Tools)
A pocket knife is one of the most versatile tools for the outdoors. There are simply so many things you can do with it:
- Prep food – cut vegetables, skin a small animal, or fillet a fish
- Open a sealed bag
- Cut a rope at exactly where you need to
- Deal with tangled vines or ropes
They are usually light and foldable, so you don’t have to worry about accidentally cutting yourself when you take them out of your pocket.
Swiss Army Knifes & Multi-tool
An even better alternative to a pocket knife is a multitool. Not only do you get a sharp blade, but you also get tweezers, can openers, scissors, nail filers, corkscrews, saws, and even a magnifying glass.
They originally came from the Swiss army where soldiers needed to perform multiple tasks in the field.
Because you get so many tools in one, they are best suited for the “jack of all trades” outdoorsman.
Duct Tape
Hmm I know you may be thinking, duct tape isn’t something often associated with the outdoors. So why is it on this list? Well, as you’ll see in a second, you can use them for so many things!
To begin with, it’s a great temporary patch to holes on pretty much anything, ranging from your tent to even your air mattress. Not only are they highly waterproof, but they are also quite resistant to wear and tear thanks to its thickness.
So if groundwater starts to seep in from slits in your tent floor, your duct tape has you covered.
Another common use of duct tape is to fix broken tent poles. Simply wrap them around the broken poles to connect them as one piece. Then it will last until you get access to a pole sleeve or a full repair kit.
And one last thing – you can seal open bags with them. You’ll likely take some snacks with you when hiking. So if you don’t finish, you wouldn’t have to worry about things spilling or getting soggy if you brought a duct tape.
And given duct tapes are cheap, they are an extremely worthy investment.
All that being said, duct tape isn’t as essential as a pocket knife or a multi-tool. It’s a nice-to-have for sure.
Fire Starter
A camping trip almost isn’t complete without a warm and glowing fire. Not only does it create the right ambiance at your campsite, it’s also an essential survival tool if you are in the backcountry. After all, you can only use the stove and cook food if you can get the fire going.
There are several things you need to start a campfire:
- Fire starter / tinder
- Kindling – dry grass, thin sticks, etc.
- Firewood for fuel
Once you’ve ignited a tiny flame, you can add more kindling to it to make it stronger. Then you add more firewood, aka fuel, to it to keep it going for hours. Check out our full article on how to build a campfire if you want to learn more.
You can get the kindling and firewood after you get to your campsite, but the fire starter is something you need to bring along.
So what makes a good fire starter? There are several options:
- Matches
- Lighter
- Bushcraft / survival fire starter with steel clip and ferro rod
We highly recommend that you pack 2 – 3 of these options so that you have a backup in case one fire starter fails. All of these are light and won’t take up much space in a backpack.
And to be extra safe, bring along some kindling as well. It can be difficult to find dry kindling after a rain, for example.
Matches
Perhaps using matches is the most straightforward way to start a fire. And I’m sure you already know how to do it.
Just one caveat – make sure you put dry matches in some kind of waterproof container before you set out for the trip. Wet matches won’t work for obvious reasons.
Lighter
You might think using a lighter is a foolproof way to get a fire started. But the truth is more nuanced — if it’s too cold or wet, it simply won’t work. And recovering a wet lighter is a challenge in and of itself.
So what can you do to maximize your chances? Here are some tips from Coalcracker Bushcraft:
- Get a bright-colored lighter that’s easy to find if you drop it in the dark
- Take off the child-proof mechanism to make it easy to switch on for survival
- Wrap some duct tape around parts of the lighter. As they catch fire easily, simply take them off and use them as tinder when you need to.
You can see the full video below:
Bushcraft Fire Starter
We actually love this! It’s such a classic item for survivalists but works well for newbies too.
Simply rub the tinder scraper against the ferro rod, and boom, you’ve got a spark going!
In many cases, the tinder scraper also doubles as a ruler, a map scaler, and even a bottle opener.
Food
This is an area where everyone has different preferences! What’s essential for others may not be essential for you.
But regardless, we think everyone should bring some snacks. Hiking will consume a lot of energy, and you may become hungry earlier than you would expect.
But on the trails, you probably won’t have a stove at your disposal, nor a restaurant nearby. Plus, going somewhere else to eat will waste precious time!
That’s why it’s important to bring snacks with you to make sure you stay energetic all day long.
Picking the Best Snack
Bringing snacks to a hiking or camping trip isn’t the same as packing your favorite bag of chips at home. Keep these things in mind to get the ideal snack:
- Calorically dense — so that you can have enough without packing large volumes of it
- Pre-made — so that you don’t have to cook it
- Have a good shelf life — so that you don’t have to worry about it going bad
There you have it. While there are many snacks that fit the bill, one of the most popular choices is the Trail Mix. It contains a variety of nuts along with m&m’s. Nuts are known to be very calorically dense, the kind of food you’d avoid if you were trying to lose weight.
Cooking Supplies and Cooler (Optional)
Few things are more pleasant than eating a delicious meal with your family or friends while being surrounded by beautiful scenery.
But be prepared to lug around a few more large items if you want to cook at your campsite. The good news is that if cooking’s not your thing, you can skip this section and save a ton of weight and effort.
Here are some things you need to cook at your campsite:
- Two-burner stove – look for one with great wind protection
- Cast iron pan – they hold heat very well and are good for cooking over a campfire
- Cooking utensils – at the minimum a spatula; you could also bring a wooden spoon, a sharp knife, or a cutting board
Now you need the ingredients. But raw meat and vegetables will go bad rather quickly if you are camping in the summer.
That’s why you need a cooler. And it’s not the bigger the better. Extra space will trap more heat, making the cooler less efficient. Keep in mind that the ice will take up 30 – 50% of the space in any cooler.
According to this buyer guide, a 40-quart cooler is good for a day trip with 3 people. But you’ll want to get a 50 – 60 quart one for a weekend trip.
To make the cooler work, you need ice. Where do you get that? Well, you can simply freeze bottles of water. That way, when they melt, you also get water for drinking. You can also pay for ice, though we don’t think it’s worth it.
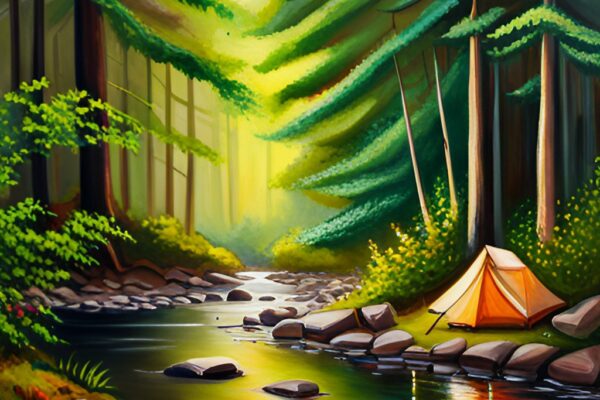
Water
It’s no surprise that water made it onto our list of 10 camping essentials. After all, you couldn’t go on any adventures if you are dehydrated.
While some frontcountry campgrounds offer running water, it’s always good to have your own.
Water Jug with Dispenser
When you are outdoors, you need water not only for drinking but also for cleaning and washing your hands.
That’s where a water jug with a dispenser comes in handy. It creates running water while keeping your hands free. Simply put it on the picnic table (if you have one) and whola!
Most of them have a 5-gallon capacity, which is sufficient for 2 – 3 people in one day.
Bottled Water
We all know that car camping gives you more creature comforts than backpacking. And bottled water is a great example of that.
A pack of 24 bottles from a local gas station could easily last you a few days, but there’s nowhere to store them besides in the trunk of your car. One thing’s for sure — they aren’t going into your backpack.
Water Purification
If you are venturing into the backcountry or going on long hikes where every ounce of weight matters, then you may need to drink water from a running creek.
How do you do that safely? Well, a quick and easy way is to use a water filter. And no, not the Brita in your kitchen.
Water filters like the LifeStraw remove close to 100% of the bacteria, parasites, and microplastics. And guess how long it takes? Less than 2 seconds, since you can stick your filter into a river and drink directly from it!
An alternative is to get some water purification tablets. These dissolve quickly while removing all the bacteria and parasites. And you will have drinkable water in around 35 minutes.
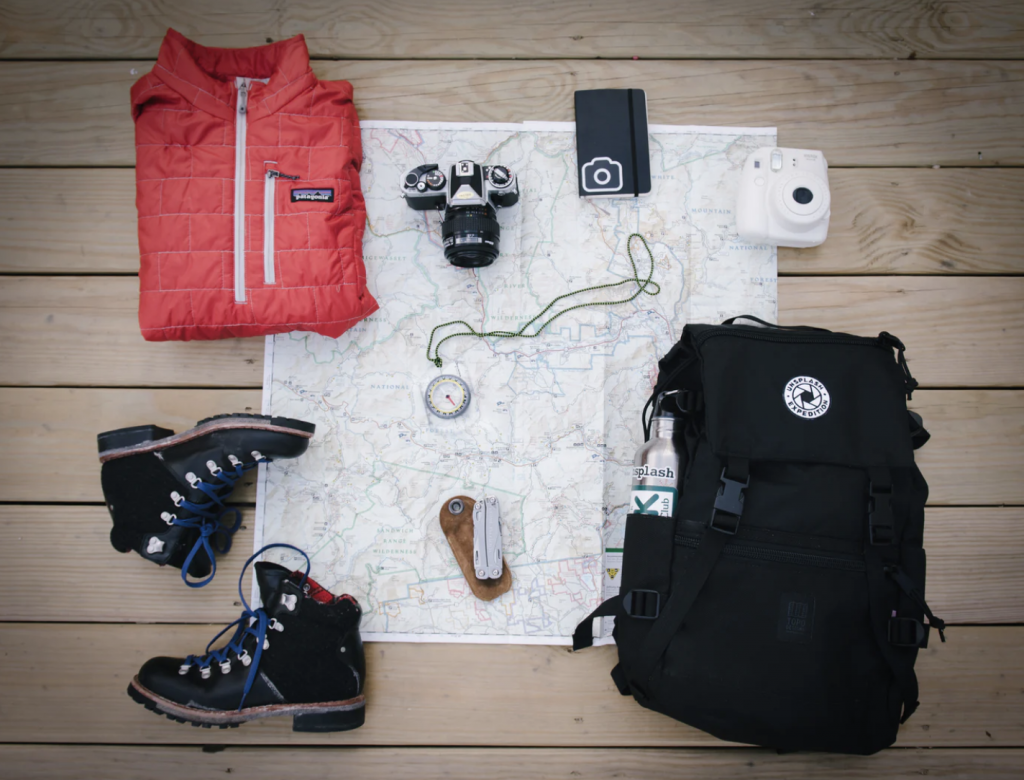
Navigation
Getting lost in the woods is no joke! With limited supplies, you will become hungry and dehydrated in no time, not to mention all the panic and frustration.
While you can download Google Maps on your phone for the area you are travelling to, they don’t always show hiking trails or track your position in the wilderness accurately.
So before you head to any remote area, get your navigation dialed in. You can either use the traditional compass with a map or a GPS with a topographic map.
Physical Maps with Compass
It’s always a good idea to grab a paper map of the area before going deep into the woods. If you are visiting a park of any sort, these will be available at the visitor center.
Another good resource is your local REI store. Their staff usually have extensive knowledge of the area with plenty of expert advice for hikers and campers.
Ideally, the maps should have not only the markings of the trails but also indications of altitude. That way you know exactly what the terrain would look like and how difficult it would be to hike.
A compass is a timeless piece of equipment but can be very tricky to use if you’ve never done it before. That’s why we’ve written a detailed guide on how to use a compass.
Once you master it, though, you can count on it every time to locate where you are or to plot a course.
Charged GPS
Though a compass appeals to the nostalgia in some campers, many prefer a GPS today for simplicity. There are some pros and cons to a GPS.
Advantages of a GPS over a compass with map:
- More accessible on trails – you can have a GPS watch right on your wrist, while you need to pull out the map from your backpack
- Easier to use – no need to spend hours on learning about the intricacies of using a compass or worrying if you’ve done it correctly on the trails
Downsides of a GPS compared to a compass with maps:
- Somewhat less reliable – electronics do break and need to be charged at all times
- More expensive – those designed for outdoorsman with topographic maps cost hundreds of dollars, while a compass costs under $20
First Aid Kit
Who likes to think about injuries when planning their trip? But trust me, it’s better to be safe than sorry. Plus, most first aid items are cheap and easy to find.
Though you’re unlikely to get any serious injuries, small cuts and blisters can ruin your trip if left untreated.
For starters, we’ve included some first aid essentials below:
- Bandages
- Antiseptics
- Scissors
- Alcohol pads
- Insect repellent
- Sunscreen
- Adhesive
- Soap
- CPR mouth barrier
- Emergency whistle
If that seems like a lot of items, there are multiple pre-packages first aid kits available today. Make only one purchase but get everything you need.
Make sure that you have enough first aid supplies for the entire group. Bring some extras if you’re travelling with kids as they are more adventurous.
And familiarize yourself with what’s inside the kit and how to use it before your trip. Most will have pretty good instructions.
Lastly, if you had bought a first aid kit a long time ago, replace any expired items.
Summary
There you have it! The 10 camping essentials you need on every trip.
To summarize, the 10 camping essentials are:
- Tent – ideally with a tarp and high-quality stakes
- Sleeping gear – sleeping pad and sleeping bag
- Sources of lighting and electricity
- Weather-appropriate clothing and rain gear
- Pocket-knife / multi-tool (duct tape recommended)
- Fire starter
- Food
- Water
- Navigation
- First aid kit
Of course, there are more items you could bring to make the most out of your camping trip. For that, check out our full camping checklist with detailed guides.