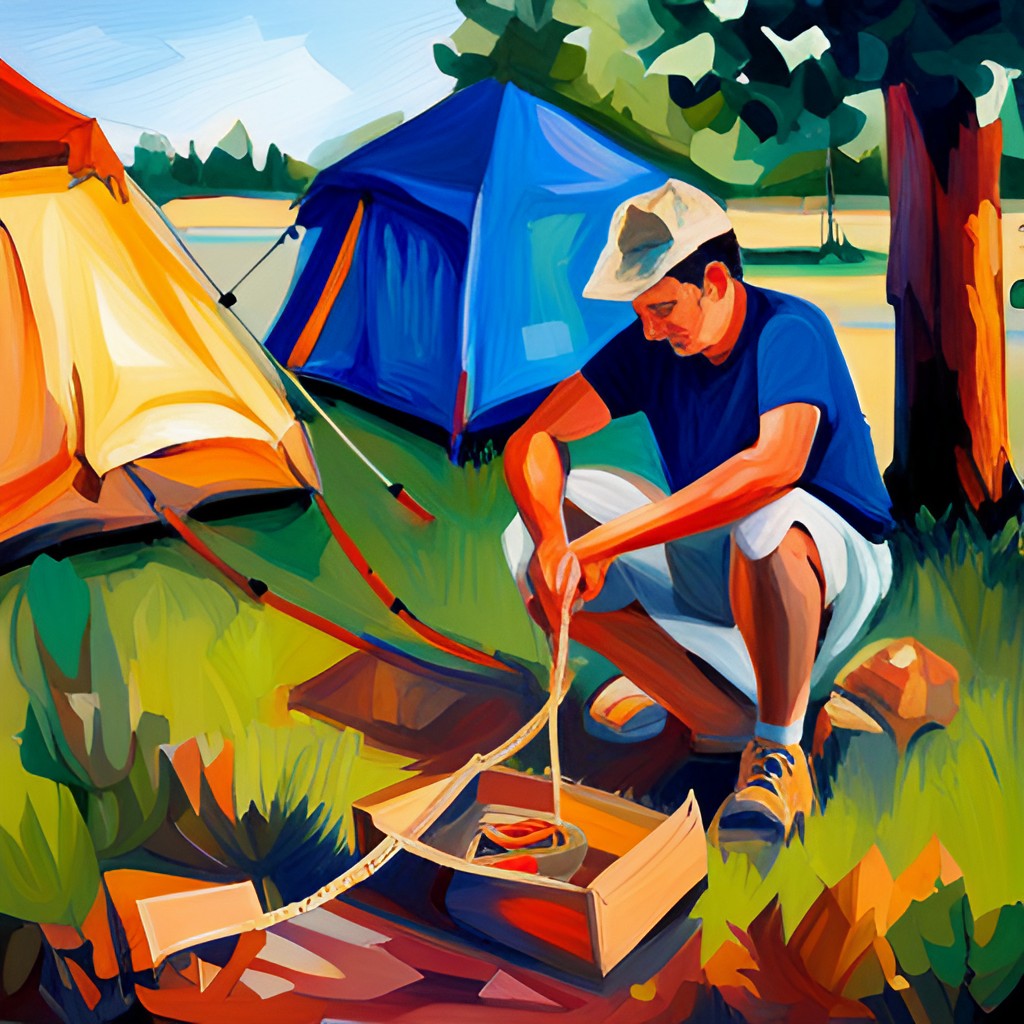
A strong grasp of knots and their tying techniques is indispensable in tent camping. The appropriate knots hold the key to a safe and delightful camping adventure, from securing your tent and arranging shelter with tarps to organizing gear and managing unexpected emergencies.
Knots serve a multitude of purposes in the camping world. They provide stability and strength, allowing you to secure your tent firmly to the ground and prevent it from being blown away by strong winds. They enable you to create sturdy and reliable shelter setups using tarps, protecting from rain, sun, or even insects. Knots also help you hang clotheslines for drying your wet gear, bundle items together for storage, or even handle emergencies like rescuing someone in need.
In this guide, we will explore a variety of tent camping knots you should know for tent camping. We will cover knots for securing the tent, setting up shelter and tarps, hanging gear, handling emergencies, and more. Each knot will be explained in detail, providing step-by-step instructions to ensure you can confidently tie them.
Whether you’re a novice camper looking to enhance your outdoor skills or an experienced adventurer seeking to refresh your knowledge, this guide will be valuable. We will also provide tips, techniques, and troubleshooting advice to help you master the art of knot tying. You’ll become proficient in these knots with practice and patience, making your camping trips safer, more organized, and ultimately more enjoyable.
- The Importance of Knot-Tying in Tent Camping – Knots You Should Know for Tent Camping
- 1. Safety and Security – The Importance of Knot-Tying in Tent Camping
- 2. Reliable Shelter Setups – The Importance of Knot-Tying in Tent Camping
- 3. Gear Organization – The Importance of Knot-Tying in Tent Camping
- 4. Emergency Situations – The Importance of Knot-Tying in Tent Camping
- 5. Versatility and Adaptability – The Importance of Knot-Tying in Tent Camping
- 6. Confidence and Self-Reliance – The Importance of Knot-Tying in Tent Camping
- The Basic Principles of Knot-Tying – Knots You Should Know for Tent Camping
- 1. Rope Selection – The Basic Principles of Knot-Tying
- 2. Rope Inspection – The Basic Principles of Knot-Tying
- 3. Proper Knot Orientation – The Basic Principles of Knot-Tying
- 4. Tension and Security – The Basic Principles of Knot-Tying
- 5. Consistency and Symmetry – The Basic Principles of Knot-Tying
- 6. Proper Dressing – The Basic Principles of Knot-Tying
- 7. Leave Adequate Tail Length – The Basic Principles of Knot-Tying
- 8. Practice and Familiarity – The Basic Principles of Knot-Tying
- The Knot-Tying Tools and Materials You Need – Knots You Should Know for Tent Camping
- 1. Rope or Cord – The Knot-Tying Tools and Materials You Need
- 2. Carabiners – The Knot-Tying Tools and Materials You Need
- 3. Cord Tensioners – The Knot-Tying Tools and Materials You Need
- 4. Rope Clips or Clamps – The Knot-Tying Tools and Materials You Need
- 5. Knot Tying Cards or Guides – The Knot-Tying Tools and Materials You Need
- 6. Knife or Scissors – The Knot-Tying Tools and Materials You Need
- 7. Lighter or Matches – The Knot-Tying Tools and Materials You Need
- 8. Protective Gloves – The Knot-Tying Tools and Materials You Need
- 9. Practice Rope or Cord – The Knot-Tying Tools and Materials You Need
- 10. Knot-Tying Apps or Websites – The Knot-Tying Tools and Materials You Need
- Knots for Securing Tents – Knots You Should Know for Tent Camping
- Knots for Shelter and Tarp Set-Ups – Knots You Should Know for Tent Camping
- Knots for Clotheslines and Hanging Gear – Knots You Should Know for Tent Camping
- Knots for Bundling and Storage – Knots You Should Know for Tent Camping
- Knots for Emergency Situations – Knots You Should Know for Tent Camping
- Knots for Campsite Projects and Repairs – Knots You Should Know for Tent Camping
- Knots for Food Storage and Bear Bag Hanging – Knots You Should Know for Tent Camping
- Advanced Knots for Experienced Campers – Knots You Should Know for Tent Camping
- Knot-Tying Tips and Techniques – Knots You Should Know for Tent Camping
- 1. Practice Makes Perfect – Knot-Tying Tips and Techniques
- 2. Learn the Basics – Knot-Tying Tips and Techniques
- 3. Understand Knot Properties – Knot-Tying Tips and Techniques
- 4. Choose the Right Rope – Knot-Tying Tips and Techniques
- 5. Keep the Rope Taut – Knot-Tying Tips and Techniques
- 6. Avoid Overly Tight Knots – Knot-Tying Tips and Techniques
- 7. Dress and Set the Knot – Knot-Tying Tips and Techniques
- 8. Familiarize Yourself with Knot Variations – Knot-Tying Tips and Techniques
- 9. Seek Guidance and Resources – Knot-Tying Tips and Techniques
- 10. Safety First – Knot-Tying Tips and Techniques
- Proper Hand Positioning and Tension Control – Knots You Should Know for Tent Camping
- Troubleshooting Common Knot-Tying Mistakes – Knots You Should Know for Tent Camping
- 1. Knot Slipping – Troubleshooting Common Knot-Tying Mistakes
- 2. Knot Jamming or Getting Stuck – Troubleshooting Common Knot-Tying Mistakes
- 3. Improper Knot Symmetry or Shape – Troubleshooting Common Knot-Tying Mistakes
- 4. Inadequate Tension or Over-tightening – Troubleshooting Common Knot-Tying Mistakes
- 5. Incorrect Selection of Knot – Troubleshooting Common Knot-Tying Mistakes
- Conclusion – Knots You Should Know for Tent Camping
- Recommended Reading – Conclusion
- Frequently Asked Questions – Knots You Should Know for Tent Camping
The Importance of Knot-Tying in Tent Camping – Knots You Should Know for Tent Camping
Knot tying is crucial in tent camping, offering numerous benefits and enhancing the overall experience. Here are some key reasons highlighting the importance of knot-tying in tent camping:
1. Safety and Security – The Importance of Knot-Tying in Tent Camping
Tying knots properly ensures the stability and security of your tent. A securely tied tent can withstand strong winds, preventing it from collapsing or getting blown away during adverse weather conditions. Properly secured guy lines and anchor points provide stability, reducing the risk of accidents and injuries.
2. Reliable Shelter Setups – The Importance of Knot-Tying in Tent Camping
Knots are essential for setting up a shelter with tarps or improvised structures. You can create a reliable and sturdy shelter that offers protection from rain, sun, wind, and insects by utilizing appropriate knots. Well-tied knots ensure the shelter remains intact, providing a comfortable and safe haven in the wilderness.
3. Gear Organization – The Importance of Knot-Tying in Tent Camping
Knots assist in efficiently organizing camping gear. Hanging a clothesline with well-tied knots lets you dry wet clothes and gear, keeping them organized and easily accessible. Additionally, knots can be used to bundle and secure equipment, preventing items from getting lost or misplaced during transport.
4. Emergency Situations – The Importance of Knot-Tying in Tent Camping
Knot-tying skills are invaluable in emergencies. Knowing how to tie knots for rescue operations or improvising solutions can be life-saving. For example, knots like the bowline on a bight or the butterfly knot can be used for securing and hoisting equipment or aiding in emergency rappelling.
5. Versatility and Adaptability – The Importance of Knot-Tying in Tent Camping
Knots offer versatility in various camping scenarios. They can be used for constructing makeshift tools, repairing equipment, or adapting to unexpected situations. Being familiar with multiple knots empowers campers to creatively solve problems and adapt to changing circumstances during their outdoor adventures.
6. Confidence and Self-Reliance – The Importance of Knot-Tying in Tent Camping
Mastering knot-tying instills confidence and self-reliance in campers. Knowing that you can effectively secure your tent, set up shelter, and handle various camping tasks using proper knots gives you a sense of empowerment and independence. It lets you control your camping experience and easily overcome challenges.
The Basic Principles of Knot-Tying – Knots You Should Know for Tent Camping
Mastering the basic principles of knot-tying is essential for successfully tying knots that are secure, reliable, and easy to untie when needed. Understanding and following these principles ensures that your knots hold firm, providing stability and safety in various camping scenarios. Here are the fundamental principles to keep in mind when tying knots:
1. Rope Selection – The Basic Principles of Knot-Tying
Choosing the right type and thickness of rope is crucial. Consider factors such as the load the knot will bear and the environmental conditions it will face. Different ropes have varying strengths, flexibility, and durability. Select a rope that is appropriate for the task at hand, ensuring it can handle the intended purpose of the knot.
2. Rope Inspection – The Basic Principles of Knot-Tying
Before tying any knot, carefully inspect the rope for any signs of wear, fraying, or damage. A weak or damaged rope can compromise the integrity of the knot and pose a safety risk. If you notice any issues with the rope, replace it with a new one. Regularly inspect your ropes to ensure they are in good condition.
3. Proper Knot Orientation – The Basic Principles of Knot-Tying
Pay close attention to the orientation of the knot. How the rope passes through and wraps around itself significantly affects the knot’s strength and stability. Following the correct sequence of movements is crucial when tying the knot. Incorrectly oriented knots may slip, come undone, or fail under pressure.
4. Tension and Security – The Basic Principles of Knot-Tying
Apply sufficient tension to the rope while tying the knot to ensure a snug and secure fit. A loose knot can quickly come undone, while an overly tight knot may strain the rope unnecessarily, compromising its strength. Find the right balance and adjust the tension accordingly.
5. Consistency and Symmetry – The Basic Principles of Knot-Tying
Strive for consistency and symmetry when tying knots. Aim for uniformity in the size and shape of loops, wraps, and crossings within the knot. Consistent knot tying helps ensure the knot’s reliability and makes it easier to untie when needed. Practice tying knots until you can achieve consistent results.
6. Proper Dressing – The Basic Principles of Knot-Tying
“Dressing” refers to arranging and tightening the knot neatly. After tying the knot, carefully adjust the rope’s strands, loops, and wraps to eliminate twists, tangles, or slack. Appropriately dressing the knot enhances its strength and reduces the likelihood of slippage or failure.
7. Leave Adequate Tail Length – The Basic Principles of Knot-Tying
When tying a knot, leave an appropriate length of tail or loose end. Sufficient tail length allows for easy untying and adjustment of the knot. If the tail is too short, untying the knot can become challenging, and it may compromise the knot’s integrity.
8. Practice and Familiarity – The Basic Principles of Knot-Tying
Like any skill, knot-tying requires practice and familiarity. Regularly engage in knot-tying exercises to improve your technique and efficiency. Familiarize yourself with the specific knots commonly used in camping scenarios. By practicing and becoming comfortable with these knots, you will develop muscle memory and the ability to tie them effortlessly.
The Knot-Tying Tools and Materials You Need – Knots You Should Know for Tent Camping
Here are some essential knot-tying tools and materials to consider:
1. Rope or Cord – The Knot-Tying Tools and Materials You Need
A strong and reliable rope or cord is the primary material for knot-tying. Choose ropes made of durable materials such as nylon, polyester, or polypropylene, with a suitable thickness based on the intended use of the knot.
2. Carabiners – The Knot-Tying Tools and Materials You Need
Carabiners are handy tools for attaching ropes or cords to anchor points, creating quick and secure connections. They come in various sizes and designs, including locking carabiners for added safety.
3. Cord Tensioners – The Knot-Tying Tools and Materials You Need
Cord tensioners, or line tensioners or adjusters, are small devices that allow you to adjust the tension and length of ropes or cords easily. They are beneficial for setting up tarps and guylines, ensuring a taut and stable shelter.
4. Rope Clips or Clamps – The Knot-Tying Tools and Materials You Need
Rope clips or clamps can secure loose ends or prevent ropes from unraveling. They are beneficial for keeping ropes organized and tidy when not in use.
5. Knot Tying Cards or Guides – The Knot-Tying Tools and Materials You Need
Knot-tying cards or pocket-sized guides provide visual instructions and illustrations of various knots. They serve as quick references in the field, helping you remember knot-tying techniques and applications.
6. Knife or Scissors – The Knot-Tying Tools and Materials You Need
A sharp knife or scissors is essential for cutting ropes to the desired length and trimming excess materials. Make sure to handle these tools with caution and prioritize safety.
7. Lighter or Matches – The Knot-Tying Tools and Materials You Need
Having a lighter or matches on hand can help melt or singe the ends of synthetic ropes to prevent fraying. This step helps maintain the rope’s integrity and prolong its lifespan.
8. Protective Gloves – The Knot-Tying Tools and Materials You Need
Depending on the thickness and texture of the rope, it may be beneficial to wear protective gloves while handling and tying knots. Gloves provide extra grip and protect your hands from abrasion or cuts.
9. Practice Rope or Cord – The Knot-Tying Tools and Materials You Need
A separate practice rope or cord allows you to hone your knot-tying skills without using the actual camping ropes. A practice rope can be made of inexpensive materials and easily replaced if damaged.
10. Knot-Tying Apps or Websites – The Knot-Tying Tools and Materials You Need
In the digital age, various knot-tying apps and websites provide step-by-step instructions, animated demonstrations, and interactive guides. These resources can be valuable references when learning new or refreshing your knot-tying knowledge.
Knots for Securing Tents – Knots You Should Know for Tent Camping
1. Figure Eight Knot – Knots for Securing Tents
The Figure Eight Knot is fundamental for securing the tent to stakes or anchor points. It creates a strong loop at the rope’s end, providing a reliable attachment point. This knot is commonly used in tent camping and has various applications.
When to Use: Securing tent lines to stakes: The Figure Eight Knot is ideal for attaching tent lines to stakes or anchor points. It offers a secure and reliable connection, ensuring the tent remains anchored.
How to Tie:
- Step 1: Cross the rope’s working end over the standing end, forming a loop.
- Step 2: Pass the working end under the standing end and bring it up through the loop.
- Step 3: Pull the working end through the loop to form a figure-eight shape.
- Step 4: Tighten the knot by pulling both the working and standing ends simultaneously, ensuring it is snug and secure.
2. Taut-Line Hitch – Knots for Securing Tents
The Taut-Line Hitch is an adjustable knot for tightening and tensioning tent guy lines. It allows you to effortlessly fine-tune the tension of the line, accommodating changes in weather conditions or when the tent fabric stretches.
When to Use: Adjusting tent guy lines: The Taut-Line Hitch is particularly useful when you need to change the tension of your tent guy lines. It allows for easy tightening or loosening without untying the knot.
How to Tie:
- Step 1: Wrap the rope’s working end around the anchor point or tent stake.
- Step 2: Bring the working end inside the loop formed in Step 1, creating a loop around the rope’s standing part.
- Step 3: Pass the working end through the loop, going over the rope’s standing part.
- Step 4: Tighten the knot by pulling the working end while holding the rope’s standing part. Adjust the tension as needed by sliding the knot up or down the standing part.
3. Guyline Hitch – Knots for Securing Tents
The Guyline Hitch is a simple and effective knot for securing tent guy lines. It is quick to tie and provides sufficient tension and stability.
When to Use: Securing tent guy lines: The Guyline Hitch is perfect for quickly and securely attaching tent guy lines to anchor points or stakes.
How to Tie:
- Step 1: Wrap the rope’s working end around the anchor point or tent stake.
- Step 2: Cross the working end over the rope’s standing part.
- Step 3: Bring the working end underneath the standing part and pass it through the loop created in Step 2.
- Step 4: Tighten the knot by pulling the working end while holding the rope’s standing part. Ensure the knot is snug and secure.
Knots for Shelter and Tarp Set-Ups – Knots You Should Know for Tent Camping
1. Clove Hitch – Knots for Shelter and Tarp Set-Ups
The Clove Hitch is a versatile knot for shelter and tarp setup. It provides a quick and secure way to attach ropes to anchor points, such as trees or poles.
When to Use: Attaching tarps or shelters: The Clove Hitch is ideal for securing tarps or shelters to anchor points. It allows for easy adjustment and provides a reliable connection.
How to Tie:
- Step 1: Pass the rope’s working end over the anchor point.
- Step 2: Cross the working end over the rope’s standing part.
- Step 3: Bring the working end under the standing part, forming a loop.
- Step 4: Pass the working end over the standing part and tuck it under the loop created in Step 3.
- Step 5: Tighten the knot by simultaneously pulling the working end and the standing part. Ensure it is snug and secure.
2. Prusik Knot – Knots for Shelter and Tarp Set-Ups
The Prusik Knot is a friction knot for creating adjustable loops along a rope. It is commonly used in shelter and tarp setups to create guy lines that can be easily adjusted and tightened.
When to Use: Creating adjustable guy lines: The Prusik Knot is perfect for creating guy lines that can be easily adjusted and tightened. It allows for flexibility in adapting to different tension requirements.
How to Tie:
- Step 1: Take a smaller diameter rope or cord and create a loop around the main rope or cord.
- Step 2: Pass the working end of the smaller rope through the loop three times, forming three wraps around the main rope.
- Step 3: Hold the standing part of the smaller rope and the main rope, and slide the wraps up towards the anchor point to tighten the knot.
- Step 4: To adjust the tension, pull the standing part of the smaller rope, which will slide the knot along the main rope and allow for tension adjustment.
3. Bowline Knot – Knots for Shelter and Tarp Set-Ups
The Bowline Knot is reliable for creating a fixed loop at the rope’s end. It is commonly used in shelter and tarp setups to develop secure attachment points or loops.
When to Use:
Creating secure attachment points: The Bowline Knot is ideal for creating secure loops or attachment points for shelter and tarp setups. It provides a reliable and non-slipping loop.
How to Tie:
- Step 1: Create a small loop in the rope’s standing part. This loop will form the fixed loop of the Bowline Knots.
- Step 2: Pass the rope’s working end through the small loop from underneath.
- Step 3: Bring the working end around the rope’s standing part.
- Step 4: Pass the working end back through the small loop, this time from over the loop.
- Step 5: Tighten the knot by pulling the working end while holding the standing part. Ensure the loop is secure and non-slipping.
These knots are essential for shelter and tarp setups during camping. The Clove Hitch allows for quick attachment, the Prusik Knot enables adjustable guy lines, and the Bowline Knot creates secure attachment points. Mastering these knots will enhance your ability to set up shelters and tarps effectively, ensuring a comfortable and protected camping experience.
Knots for Clotheslines and Hanging Gear – Knots You Should Know for Tent Camping
1. Sheet Bend – Knots for Clotheslines and Hanging Gear
The Sheet Bend is a reliable knot for joining two ropes of different sizes or materials. It is commonly used for clotheslines and hanging gear when ropes are extended. Here’s when and how to use the Sheet Bend:
When to Use: Joining ropes: The Sheet Bend is ideal for connecting ropes of different sizes or materials, making it helpful in extending clotheslines or hanging gear.
How to Tie:
- Step 1: Take the working end of the larger rope and create a bight (a U-shaped bend) in it.
- Step 2: Pass the working end of the smaller rope through the bight from underneath.
- Step 3: Bring the working end of the smaller rope behind both parts of the larger rope.
- Step 4: Pass the working end of the smaller rope over the top of the bight and tuck it under itself.
- Step 5: Tighten the knot by pulling both ropes in opposite directions. Ensure the knot is secure and the ropes are properly joined.
2. Trucker’s Hitch – Knots for Clotheslines and Hanging Gear
The Trucker’s Hitch is a versatile knot that creates a mechanical advantage to tighten and secure ropes. It is commonly used for clotheslines and hanging gear when applying significant tension.
When to Use: Applying tension and securing ropes: The Trucker’s Hitch is perfect for creating a tight and secure line for clotheslines or hanging gear. It allows for easy adjustment and provides a high level of tension.
How to Tie:
- Step 1: Tie a Figure Eight Knot or a Slip Knot near the fixed end of the rope.
- Step 2: Create a loop with the rope’s working end and pass it through the anchor point or around an object.
- Step 3: Pass the rope’s working end through the loop you created in Step 2.
- Step 4: Create a second loop with the working end and pass it through the first loop.
- Step 5: Pull the working end to tighten the knot, applying tension to the rope. Secure the knot by tying off the working end with a Half Hitch or another knot.
3. Double Fisherman’s Knot – Knots for Clotheslines and Hanging Gear
The Double Fisherman’s Knot is a secure knot used for joining two ropes of similar size together. It creates a strong connection that resists slipping or coming undone. It is commonly used for clotheslines and hanging gear when you need a reliable and secure attachment.
When to Use: Joining ropes securely: The Double Fisherman’s Knot is ideal for joining ropes of similar size to create a secure connection. It helps extend clotheslines or attach gear.
How to Tie:
- Step 1: Take the working end of one rope and create a loop.
- Step 2: Pass the working end of the second rope through the loop created in Step 1.
- Step 3: Bring the working end of the second rope behind both parts of the first rope.
- Step 4: Pass the working end of the second rope through the loop a second time.
- Step 5: Repeat Steps 1-4 with the first rope, creating a second set of loops.
- Step 6: Tighten the knot by pulling both ropes in opposite directions. Ensure the knot is snug and secure.
These knots are essential for clotheslines and hanging gear during camping trips. The Sheet Bend joins ropes of different sizes, the Trucker’s Hitch applies tension and secures ropes, and the Double Fisherman’s Knot securely joins ropes of similar sizes. Mastering these knots will enhance your ability to set up clotheslines, hang gear, and ensure secure attachments, making your camping experience more organized and convenient.
Knots for Bundling and Storage – Knots You Should Know for Tent Camping
1. Square Knot – Knots for Bundling and Storage
The Square Knot, also known as the Reef Knot, is a simple and versatile knot for bundling and securing items. It is commonly used for bundling gear, tying packages, or organizing cords. Here’s when and how to use the Square Knot:
When to Use: Bundling items: The Square Knot is ideal for securely bundling items like gear or packages. It provides a reliable connection that holds items tightly.
How to Tie:
- Step 1: Cross the right end of the rope over the left end.
- Step 2: Take the right end and pass it under the left end.
- Step 3: Cross the left end over the right end.
- Step 4: Pass the left end under the right end.
- Step 5: Pull both ends simultaneously to tighten the knot. Ensure it is snug and secure.
2. Barrel Hitch – Knots for Bundling and Storage
The Barrel Hitch is a knot for temporarily securing cylindrical objects, such as barrels or canisters. It provides a reliable way to secure items for storage or transportation. Here’s when and how to use the Barrel Hitch:
When to Use: Securing cylindrical objects: The Barrel Hitch temporarily secures barrels, canisters, or other cylindrical objects during storage or transportation.
How to Tie:
- Step 1: Create a loop with the rope and place it over the top of the barrel, aligning the loop’s midpoint with the center of the barrel.
- Step 2: Bring the two ends of the rope down and cross them underneath the barrel, forming an “X.”
- Step 3: Wrap each end of the rope around the barrel, moving in opposite directions.
- Step 4: Cross the ends over each other on the barrel.
- Step 5: Pass each end through the loop formed in Step 2, creating a hitch.
- Step 6: Pull both ends of the rope to tighten the hitch. Ensure the barrel is securely fastened.
3. Constrictor Knot – Knots for Bundling and Storage
The Constrictor Knot is used for binding or tying objects tightly. It is known for its ability to grip objects firmly, making it suitable for bundling and storage.
When to Use: Binding objects tightly: The Constrictor Knot is perfect for tightly binding objects together for storage or transportation. It provides a strong grip that resists loosening.
How to Tie:
- Step 1: Pass the rope’s working end around the object you want to bind.
- Step 2: Cross the working end over the rope’s standing part.
- Step 3: Wrap the working end around the object and the standing part, creating multiple wraps.
- Step 4: Pass the working end under the wraps created in Step 3.
- Step 5: Bring the working end back over the wraps and tuck it under itself.
- Step 6: Pull both ends of the rope to tighten the knot, ensuring it grips the object tightly.
These knots are essential for bundling and storage purposes during camping trips. The Square Knot securely bundles items together, the Barrel Hitch temporarily secures cylindrical objects, and the Constrictor Knot tightly binds objects. Mastering these knots will help you keep your gear organized, prevent items from shifting during storage or transportation, and make your camping experience more efficient.
Knots for Emergency Situations – Knots You Should Know for Tent Camping
1. Bowline on a Bight – Knots for Emergency Situations
The Bowline on a Bight is a knot used in emergencies when a secure loop is needed to lift or lower a person or object. It creates a strong and reliable loop that can support the weight without slipping or coming undone.
When to Use: Emergency rescue situations: The Bowline on a Bight is commonly used to create a secure loop for lifting or lowering a person or object. It provides a reliable attachment point.
How to Tie:
- Step 1: Create a bight (a U-shaped bend) in the rope.
- Step 2: With one side of the bight, form a small loop by passing it over the other side of the bight.
- Step 3: Pass the same end through the small loop created in Step 2.
- Step 4: Bring the same end around the back of the large loop.
- Step 5: Pass the end through the small loop again, this time from the front.
- Step 6: Tighten the knot by pulling both ends of the rope. Ensure the loop is secure and properly formed.
2. Munter Hitch – Knots for Emergency Situations
The Munter Hitch, also known as the Italian Hitch, is a versatile knot used in emergencies for belaying or rappelling. It can be tied quickly and provides friction on the rope to control descent or arrest a fall.
When to Use: Emergency rappelling or belaying: The Munter Hitch is ideal for emergencies that require rappelling or belaying, providing a quick and reliable method for controlling descent or stopping a fall.
How to Tie:
- Step 1: Take the rope and create a loop with the working end on top and the standing part on the bottom.
- Step 2: Hold the loop with one hand and twist it away from you to create an X-shape.
- Step 3: Bring the loop around the rope’s standing part, forming a second loop.
- Step 4: Pass the rope’s working end through the second loop.
- Step 5: Hold the rope’s standing part and tighten the knot by pulling the working end. Adjust the friction by varying the size of the loop.
3. Butterfly Knot – Knots for Emergency Situations
The Butterfly Knot, also known as the Alpine Butterfly Knot, is used in emergencies to create a secure and non-slipping loop in the middle of a rope. It can be used for various purposes, such as equalizing anchor points or creating a fixed loop in a damaged section of rope.
When to Use: The Butterfly Knot is often used in emergencies to balance multiple anchor points, distributing the load evenly among them. The Butterfly Knot is also useful when a non-slipping loop is needed in the middle of a rope to isolate a damaged section.
How to Tie:
- Step 1: Create a bight in the rope, forming a loop with the working end on top and the standing part on the bottom.
- Step 2: Bring the working end around the front of the loop, then pass it over the standing part from behind.
- Step 3: Pass the working end through the loop from underneath.
- Step 4: Bring the working end behind the standing part, then pass it through the loop again from behind.
- Step 5: Tighten the knot by simultaneously pulling the working end and the standing part. Ensure the loop is secure and properly formed.
These knots are essential in emergencies, providing solutions for lifting or lowering, rappelling or belaying, and creating secure mid-rope loops. The Bowline on a Bight creates a strong loop, the Munter Hitch allows for controlled descent, and the Butterfly Knot serves various purposes. Understanding and practicing these knots will help you be prepared for unexpected situations during your camping adventures.
Knots for Campsite Projects and Repairs – Knots You Should Know for Tent Camping
1. Half Hitch – Knots for Campsite Projects and Repairs
The Half Hitch is a simple and versatile knot used for various campsite projects and repairs. It is commonly used to attach ropes to objects, secure tarps, or create makeshift fastenings. Here’s when and how to use the Half Hitch:
When to Use: The Half Hitch is useful for quickly attaching a rope to an object, such as a pole or branch. It provides a temporary fastening and can be easily adjusted or removed.
How to Tie:
- Step 1: Pass the rope’s working end around the object.
- Step 2: Cross the working end over the rope’s standing part.
- Step 3: Bring the working end under the standing part and pass it through the loop created.
- Step 4: Tighten the knot by pulling the working end and adjusting the tension as needed.
2. Timber Hitch – Knots for Campsite Projects and Repairs
The Timber Hitch is a knot for gripping and securing cylindrical objects like logs or poles. It provides a reliable attachment point and can withstand tension or pulling forces. Here’s when and how to use the Timber Hitch:
When to Use: Securing cylindrical objects: The Timber Hitch is commonly used for securing logs or poles, making it useful for various campsite projects or repairs that involve handling or moving such objects.
How to Tie:
- Step 1: Pass the rope’s working end around the object.
- Step 2: Cross the working end over the rope’s standing part.
- Step 3: Bring the working end under the standing part and pass it over itself.
- Step 4: Continue wrapping the working end around the standing part and the object, creating several turns.
- Step 5: Tuck the working end under the final turn and pull it tight, ensuring a secure grip.
3. Rolling Hitch – Knots for Campsite Projects and Repairs
The Rolling Hitch knot temporarily attaches to a fixed rope or object. It can slide along the rope when tension is applied in one direction but holds firm when the load is released.
When to Use: Temporary attachment to a fixed rope or object: The Rolling Hitch is suitable for temporarily securing a rope to a fixed object. It is often used in campsite projects or repairs that require a quick and adjustable attachment.
How to Tie:
- Step 1: Pass the rope’s working end around the fixed rope or object.
- Step 2: Cross the working end over the rope’s standing part.
- Step 3: Bring the working end under the standing part and pass it over itself.
- Step 4: Create a second turn by bringing the working end around the standing part.
- Step 5: Tuck the working end under the second turn and pull it tight, ensuring the hitch grips the rope or object securely.
These knots are valuable for various campsite projects and repairs. The Half Hitch is handy for attaching ropes to objects, the Timber Hitch provides a reliable grip on cylindrical objects, and the Rolling Hitch allows for temporary attachments. Mastering these knots will enable you to confidently tackle campsite tasks and efficiently address any repairs that may arise during your camping adventures.
Knots for Food Storage and Bear Bag Hanging – Knots You Should Know for Tent Camping
1. Clove Hitch on a Bight – Knots for Food Storage and Bear Bag Hanging
The Clove Hitch on a Bight is a knot for hanging food storage bags or bear bags in camping to keep them out of animal reach. It creates a secure attachment point that allows for easy adjustment and removal. Here’s when and how to use the Clove Hitch on a Bight:
When to Use: Hanging food storage or bear bags: The Clove Hitch on a Bight is ideal for suspending food or bear bags from a tree branch or other elevated structure, keeping them away from wildlife.
How to Tie:
- Step 1: Create a bight (a U-shaped bend) in the rope, leaving a long enough tail to hang the bag.
- Step 2: Place the bight over the tree branch or elevated structure, with the tail hanging down.
- Step 3: Pass one side of the bight behind the rope’s standing part.
- Step 4: Cross the same side of the bight over the standing part and tuck it under itself.
- Step 5: Tighten the knot by pulling both ends of the rope, ensuring the bag is securely suspended.
2. Siberian Hitch – Knots for Food Storage and Bear Bag Hanging
The Siberian Hitch, also known as the Siberian Bear Hitch, is a knot for hanging food bags or bear bags while camping. It provides a secure and adjustable attachment point and is less likely to slip or loosen. Here’s when and how to use the Siberian Hitch:
When to Use: Hanging food storage or bear bags: The Siberian Hitch is specifically designed for hanging food bags or bear bags, preventing animals from accessing the contents.
How to Tie:
- Step 1: Create a loop with the rope and pass the working end through the loop.
- Step 2: Wrap the working end around the rope’s standing part twice or thrice, creating turns.
- Step 3: Pass the working end through the loop again from the opposite direction of the initial pass.
- Step 4: Adjust the length of the loop and tighten the hitch by pulling both ends of the rope. Ensure the bag is hanging securely.
3. Packer’s Knot – Knots for Food Storage and Bear Bag Hanging
The Packer’s Knot is used to secure the opening of a bag, sack, or food storage container. It creates a tight closure that helps protect the contents from moisture, pests, or accidental spillage. Here’s when and how to use the Packer’s Knot:
When to Use: Securing the opening of bags or containers: The Packer’s Knot is suitable for securing the opening of various storage bags, sacks, or containers, particularly those used for food storage.
How to Tie:
- Step 1: Fold the top opening of the bag or container to create a flap.
- Step 2: Tie a simple overhand knot with the flap, leaving a long tail.
- Step 3: Take the tail of the knot and wrap it around the base of the knot, creating multiple wraps.
- Step 4: Pass the tail through the loop created by the wraps.
- Step 5: Tighten the knot by pulling the tail, ensuring the opening is securely closed.
These knots are crucial for food storage and bear bag hanging during camping trips. The Clove Hitch on a Bight and Siberian Hitch provides secure attachments for hanging bags, while the Packer’s Knot ensures the contents of storage bags are tightly sealed. Using these knots, you can protect your food from wildlife and prevent unwanted access or contamination.
Advanced Knots for Experienced Campers – Knots You Should Know for Tent Camping
Advanced campers often seek to expand their knot-tying repertoire with more specialized and intricate knots. Here are three advanced knots that experienced campers can add to their skill set:
1. Alpine Butterfly Knot – Advanced Knots for Experienced Campers
The Alpine Butterfly Knot is a versatile knot used in various camping scenarios. It creates a secure loop that can be easily adjusted and undone even after loading. This knot is ideal for creating a fixed loop in the middle of a rope, which can be helpful in rigging guy lines, attaching equipment, or making a temporary anchor point.
To tie the Alpine Butterfly Knot:
- Create a bight in the rope, forming two parallel strands.
- Take the rope’s working end and make three twists around both strands, ensuring the twists are snug and close together.
- Pass the working end through the bight from the bottom, then feed it back through the twists.
- Tighten the knot by pulling on the rope’s standing part and the working end. Ensure the knot is appropriately dressed and set.
2. Prusik Loop – Advanced Knots for Experienced Campers
The Prusik Loop is a friction knot that allows you to create an adjustable loop on another rope. It is commonly used in camping and mountaineering for tasks such as ascending or descending ropes, creating makeshift pulley systems, or securing items to a line.
To tie a Prusik Loop:
- Trap a short loop or accessory cord around the main rope, crossing the working end over the standing part.
- Pass the working end of the loop behind the standing part and through the loop formed by the initial wrap.
- Make two additional wraps with the working end, passing it behind the standing part and through the loop each time.
- Ensure the wraps are snug and parallel to each other, then adjust the loop size by sliding the Prusik Loop up or down the main rope. The friction between the wraps and the main rope will hold the loop in place.
3. Monkey’s Fist Knot – Advanced Knots for Experienced Campers
The Monkey’s Fist Knot is a decorative and functional knot that can be used as a weight or a throwing line for tasks like securing a rope to a distant anchor point or throwing a line over a tree branch. It consists of a dense spherical knot with a weighted core.
To tie a Monkey’s Fist Knot:
- Create a small loop with the rope’s working end, leaving a long tail.
- Begin wrapping the long tail around your fingers, forming a series of loops. The number of circles will depend on the desired size of the finished knot.
- Continue wrapping until you have reached the desired loops, ensuring they are tight and evenly spaced.
- Pass the long tail through the center of the loops, following the same path as the initial loop.
- Pull the long tail tight while guiding the loops into a spherical shape.
- Adjust and tighten the knot, shaping it into a neat and compact sphere. Trim any excess rope if necessary.
Remember, advanced knots require practice and an understanding of their specific applications. Always ensure proper safety precautions and test the reliability of the knots before relying on them in critical situations. With experience and proficiency, these advanced knots can become valuable additions to an experienced camper’s toolkit.
Knot-Tying Tips and Techniques – Knots You Should Know for Tent Camping
In tent camping, mastering knot tying is an essential skill that can significantly enhance your camping experience. Here are some valuable tips and techniques to help you become proficient in tying knots for tent camping:
1. Practice Makes Perfect – Knot-Tying Tips and Techniques
Regular practice is crucial in improving your knot-tying skills. Set aside some time before your camping trip to practice tying different knots. The more you practice, the more comfortable and efficient you’ll become.
2. Learn the Basics – Knot-Tying Tips and Techniques
Start by mastering a few basic knots commonly used in tent camping. These include the square knot, bowline knot, and clove hitch. Once you’ve become proficient in these foundational knots, you can move on to more advanced ones.
3. Understand Knot Properties – Knot-Tying Tips and Techniques
Each knot has unique properties and applications. Some knots create loops, while others are meant to secure objects or adjust tension. Understand the characteristics of each knot and when they are most suitable to use.
4. Choose the Right Rope – Knot-Tying Tips and Techniques
The type and thickness of the rope or cordage you use can affect the performance of your knots. For general camping purposes, choose a rope that is strong, durable, and easy to handle. Paracord or nylon ropes are popular choices for tent camping due to their strength and versatility.
5. Keep the Rope Taut – Knot-Tying Tips and Techniques
When tying knots, ensure the rope is taut throughout the process. Loose or slack ropes can lead to weak or unreliable knots. Take the time to tighten the knot properly before relying on it for securing your tent or other camping gear.
6. Avoid Overly Tight Knots – Knot-Tying Tips and Techniques
While keeping the rope taut is essential, be mindful not to overtighten the knots. Overly tight knots can become challenging to untie, especially if they have been under tension for a prolonged period. Maintain a balance between a secure knot and the ability to untie it easily when needed.
7. Dress and Set the Knot – Knot-Tying Tips and Techniques
After tying a knot, “dress” and “set” it correctly. Dressing the knot involves arranging the rope segments neatly to ensure optimal functionality and strength. Setting the knot involves tightening it securely by pulling on all appropriate segments. Appropriately dressing and setting the knot will increase its reliability.
8. Familiarize Yourself with Knot Variations – Knot-Tying Tips and Techniques
Many knots have variations or alternative methods of tying them. Familiarize yourself with these variations, as they can offer different advantages depending on the situation. Experiment with different variations to find the ones that work best for you.
9. Seek Guidance and Resources – Knot-Tying Tips and Techniques
Numerous resources are available to learn about knot tying, including books, online tutorials, and videos. Use these resources to expand your knowledge and learn new knots and techniques.
10. Safety First – Knot-Tying Tips and Techniques
Always prioritize safety when tying knots. Ensure your knots are secure and reliable to avoid accidents or damage to your camping equipment. Regularly inspect your knots to ensure they are holding correctly, and make any necessary adjustments as needed.
Proper Hand Positioning and Tension Control – Knots You Should Know for Tent Camping
Proper hand positioning and tension control are essential when tying knots for tent camping. They contribute to the overall effectiveness and reliability of the knots you create.
When tying knots, it is crucial to maintain a firm grip on the rope with both hands. Start by holding the rope’s working end in one hand and the standing part in the other. It lets you control the rope’s movement and maintain tension throughout the knot-tying process.
Keep your hands positioned close to the knot you are tying. This proximity provides better control and accuracy, reducing the risk of making mistakes or producing loose knots. Avoid letting excessive lengths of rope hang loose between your hands, as it can hinder your ability to apply tension effectively.
Maintaining the right amount of tension is vital for creating secure knots. Too much tension can cause the rope to stretch or become strained, weakening the knot’s strength. Insufficient tension may result in loose knots that can easily come undone. Strive for a balanced tension that is firm and consistent but not overly tight.
To achieve proper tension, apply controlled pressure as you tighten the knot with your hands. Gradually increase the tension by pulling the rope with both hands simultaneously. It allows you to monitor the tightness of the knot and make any necessary adjustments along the way.
Be mindful of the specific requirements of each knot. Some knots may require a tighter tension, while others may need a looser or adjustable tension. Adjust your hand pressure to ensure the knot is secure and meets its intended purpose.
Additionally, pay attention to the direction of the forces applied to the rope. For example, if you tie a knot to secure a tent, consider the direction from which wind or other external forces may act upon the rope. Apply tension to counteract these forces and ensure the knot remains strong and stable.
Remember to practice proper hand positioning and tension control when tying knots for tent camping. With practice, you will understand how much pressure to apply and how to maintain consistent tension. These skills will enhance the reliability of your knots and contribute to a safe and enjoyable camping experience.
Troubleshooting Common Knot-Tying Mistakes – Knots You Should Know for Tent Camping
While knot-tying is an essential skill for tent camping, it’s common to encounter mistakes. Understanding and addressing these mistakes can help you tie reliable and secure knots. Here are some common knot-tying errors and troubleshooting tips to overcome them:
1. Knot Slipping – Troubleshooting Common Knot-Tying Mistakes
Problem: One of the most common issues is when knots slip and become loose, compromising their security.
Solution: To prevent knots from slipping, apply consistent tension throughout the tying process. Double-check that all wraps and loops are properly formed and tightened. Add additional turns or wraps to increase friction and improve the knot’s holding power if needed. Alternatively, consider using a different knot more suitable for the intended purpose and provides better security against slippage.
2. Knot Jamming or Getting Stuck – Troubleshooting Common Knot-Tying Mistakes
Problem: Sometimes, knots can become jammed or stuck, making them challenging to untie when needed.
Solution: To avoid knot jamming, ensure that the rope is not twisted or tangled while tying the knot. Pay attention to the order in which the wraps and loops are formed and make sure they are correctly aligned. Lubricating the knot with water, saliva, or lubricant can also help reduce friction and facilitate untying. If all else fails, carefully cut the rope and start over if it is not salvageable.
3. Improper Knot Symmetry or Shape – Troubleshooting Common Knot-Tying Mistakes
Problem: Knots may become asymmetrical or distorted, affecting strength and stability.
Solution: Maintain good hand control and symmetry while tying the knot. Pay attention to the path and direction of the rope as you form the knot, ensuring that it follows the correct pattern. Adjust and align the wraps, loops, and crossings to achieve a balanced and visually pleasing knot. Practice and familiarity with the knot will improve your ability to create symmetrical and well-formed knots.
4. Inadequate Tension or Over-tightening – Troubleshooting Common Knot-Tying Mistakes
Problem: Inconsistent tension can weaken the knot’s holding power or make it difficult to untie. Over-tightening can make it challenging to adjust or undo the knot later.
Solution: Achieving the right amount of tension requires practice and attentiveness. Apply controlled and even pressure while tightening the knot, ensuring that it is snug and secure without being overly tight. Find the balance between a knot that holds firmly and one that can be easily adjusted or untied when needed. Regularly check the tension as you tie the knot to make adjustments as necessary.
5. Incorrect Selection of Knot – Troubleshooting Common Knot-Tying Mistakes
Problem: Choosing the wrong knot for the intended purpose can lead to weak or unreliable results.
Solution: Understanding the characteristics and applications of different knots is essential. Take the time to learn various knots and their specific uses. Consider factors such as the type of load, direction of forces, and desired adjustability. Select a suitable knot for the task, ensuring it provides strength, security, and adjustability.
Conclusion – Knots You Should Know for Tent Camping

Mastering the art of knot tying is an essential skill for any tent camper. The proper knots can make a significant difference in securing your tent, setting up shelters and tarps, organizing your gear, handling emergencies, and enhancing your overall camping experience.
For securing the tent, knots such as the Figure Eight Knot, Taut-Line Hitch, and Guyline Hitch provide reliable and adjustable options to keep your tent firmly anchored in place. Regarding shelter and tarp setup, the Clove Hitch, Prusik Knot, and Bowline Knot offer versatility in creating stable structures and adjusting tension as needed.
For clothesline and hanging gear, the Sheet Bend, Trucker’s Hitch, and Double Fisherman’s Knot excel in securing ropes, creating adjustable lines, and joining different cords. In bundling and storage, the Square Knot, Barrel Hitch, and Constrictor Knot provide solutions for bundling equipment, securing loads, and preventing slippage.
In emergencies, the Bowline on a Bight, Munter Hitch, and Butterfly Knot are useful knots for rescue, rappelling, or creating secure anchor points. And for campsite projects and repairs, the Half Hitch, Timber Hitch, and Rolling Hitch be helpful in various tasks, such as securing poles, tying off ropes, or creating temporary fixes. Lastly, for food storage and bear bag hanging, the Clove Hitch on a Bight, Siberian Hitch, and Packer’s Knot offers reliable methods to secure food and protect it from wildlife.
By understanding the purpose and applications of these knots and practicing their tying techniques, you can confidently navigate various camping situations and ensure your campsite’s safety, security, and efficiency of your campsite. Remember to consider factors such as the type of load, adjustability requirements, and environmental conditions when selecting and tying knots. So, whether you are a novice camper or an experienced outdoor enthusiast, investing time in learning and practicing these essential knots will empower you to handle various camping challenges easily.
Recommended Reading – Conclusion
Internal:
Solo Tent Camping: Tips And Tricks For A Safe And Enjoyable Experience – Tent Camping Trips
How Big Should Your Tarp Be? – Tarp Sizes With 8 Unique Scenarios – Tent Camping Trips
External:
Camping Knots: 6 Essential Knots for Campers – Cool of the Wild
YouTube: https://www.youtube.com/watch?v=K5AORPYM16U
Frequently Asked Questions – Knots You Should Know for Tent Camping
1. How Do You Tie a Tent Knot? – FAQs
To tie a tent knot, follow these steps:
- Begin by passing the rope or cord around the anchor point or object you’re securing, such as a tent stake or loop on your tent.
- Cross the rope’s working end over the standing part to create a loop.
- Pass the rope’s working end through the loop, forming a simple overhand knot.
- Tighten the knot by pulling both ends of the rope in opposite directions.
- Ensure the knot is snug and secure, adjusting the tension as needed.
- Test the knot’s strength by gently pulling on the rope to ensure it holds firmly in place.
Remember to practice tying the knot several times to become proficient and ensure a secure hold for your tent.
2. What is Knot-Tying Used for in Camping? – FAQs
Knot tying in camping is used for various purposes, including securing tents and tarps, hanging gear and clotheslines, bundling and storing equipment, creating emergency harnesses, and performing campsite projects and repairs.
3. What is the Primary Way to Anchor Your Tent? – FAQs
The primary way to anchor a tent is by using tent stakes. Tent stakes are usually lightweight metal or plastic spikes inserted into the ground through the loops or grommets on the corners and edges of the tent. These stakes provide stability and help secure the tent firmly to the ground, preventing it from being blown away by wind or other external forces.
They are typically hammered or pushed into the ground at a 45-degree angle, ensuring a secure hold. Choosing stakes suitable for the terrain and conditions you’ll be camping in is essential, as different stakes are designed for various ground types, such as rocky, sandy, or soft soil. Additionally, using guylines and adjustable tensioning systems, in combination with tent stakes, can further enhance the stability of your tent in windy conditions.