You are going camping soon. You are excited. But thinking about all the things you need to bring can be overwhelming. You may also have questions after seeing other checklists on the internet.
So I created a camping checklist with all the essentials and optional items within each category, based on personal experience and hours of research.
You can also get detailed guides by clicking on the link in each section heading when you have any questions or want more practical tips.
Simply go through the list below and check any items you have packed. The page is dynamic and will store your progress if you leave the page and come back later. Or download the printer-friendly PDF version (checkboxes may not appear in preview but will appear in printed version):
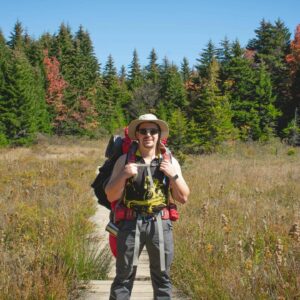
Another note is that this list is more suitable for car camping, where you drive to your campground as opposed to hike in. See a backpacking checklist here.
Sleep & Shelter
Essentials
Optional
Campsite Gear & Furniture
Essentials
Optional
Campsite Kitchen
Essentials
Consumables
Optional
Clothing & Footwear
Essentials
Cold/rainy Weathers
Optional
Personal
Essentials
Optional
Health & Hygiene
Essentials
Optional
First Aid Kit (Essentials Only)
Tools & Repair
Essentials
Optional
Recreation & Entertainment (Optional)
Camping with Dogs (Optional)
The Ultimate Guide
Shelter & Sleep
Tent and Tent accessories
A tent might be the first thing that comes to your mind when you think about camping. And it is indeed one of the most important pieces of gear. After all, how can you explore and be adventurous during the day without sleeping well? Below are some quick tips for getting exactly the right tent for you.
First, know your size and space requirements. How many people are you camping with? I recommend “sizing up” for 1 – 2 people. If a tent is labeled for 3 people, it means you can put 3 sleeping bags side by side, with each getting ~2 feet of space. So don’t expect much space for extra gear or comfort.
Second, make sure you choose the right tent for the weather. Always check the weather forecast before you go. Tents are rated as 3-season or 4-season. The materials will be different. Some frames and fabrics are much more wind or water-resistant.
Finally, try to see the tent in person before you buy. Make sure you like the amount of space, the storage pockets, weight, rainfly, etc. You may appreciate many features you haven’t even thought about!
Oh and don’t forget to pitch your tent before you go. Getting a practice round makes things easier at your campsite. You don’t want to be fumbling in the dark or be that camper everyone else looks at.
Get some tent stakes on top of the tent itself. These are little poles you place around your tent to keep it in place, which can be especially helpful in windy or stormy conditions. You will also need a hammer or mallet to place the tent stakes.
Yes, a tent can be quite expensive. So I recommend you get a tent footprint to protect the bottom of your tent against dirt, rock, and rainwater on the ground.
Sleeping Pad or Air Mattresses
I don’t want to sleep on hard surfaces with sharp rocks. No one wants to. This is where the sleeping pad or air mattress comes in to provide comfort and insulation.
Ok ok I know you might be wondering, which one should I choose? The short answer is: choose an air mattress for more comfort when you are camping in warm weather and close to your car. Air mattresses are next to impossible to carry on a backpacking trip. Choose a sleeping pad if you want to save space/weight, camp in colder weather, want more versatility, or are on a budget. Sleeping pads usually offer better insulation, keeping you warmer than air mattresses.
If you bring an air mattress, remember to take the pump. If you want to get a sleeping pad, see here for a more detailed guide.
One more tip: make sure your sleeping pad/air mattress can actually fit into your tent!
Sleeping Bag
Now you have your tent and mattress/sleeping pad set up, it’s time to get into your sleeping bag for a good rest. Below are some tips to get the most out of your sleeping bag:
First, understand the temperature rating, the lowest temperature at which the bag can keep you warm. Choose a sleeping bag rated for a lower temperature than the night temperature of your campsite to have a buffer. Again, be sure to read the weather forecast.
Second, if you are a warm sleeper or camping in chillier conditions, I recommend you go with the mummy-style sleeping bag. It is narrow at the feet, wider around the shoulders, and has a hood that wraps around your head. You can actually tighten it and cinch out the excess air for better insulation. Compare this to the rectangular style, which has more opening and airflow.
Third, understand how your sleeping bag and sleeping pad work together as a system. How warm you feel in your sleeping bag will be dependent on your sleeping pad (a metric called the R-value). See more technical information and types here.
Sleeping bag liners are optional, but I use them most of the time. It adds more insulation in colder conditions while eliminating the hassle of upgrading to a thicker, bulkier sleeping bag! It also helps prolong the life of your sleeping bag if you use it in the summer.
Lastly, you can always bring a few extra blankets if you worry the weather may be colder than expected.
In recent years, quilt has been gaining popularity as the ultra-light alternative for sleeping bags. It is more for backpackers and less relevant for car campers.
Camping pillow
I just bring my pillow from home to get the most comfort unless I’m backpacking. Camping pillows are lighter and more compact. But space and weight are less of a consideration for car campers.
Campsite Gear and Furniture
Whew! You finally went through all the efforts needed to set up your shelter. And you might think you are ready to go and enjoy your campsite. But hang in there; while you can think of your tent and sleeping system as your bedroom, you still have to set up your “living room”. This leads to a few more essentials for your campsite.
To start off, double-check if your campsite has picnic tables, along with chairs. If not, bring your own table. Many camping tables are foldable for easy setup and transport. Even if there’s a picnic table, I still bring my own camping chairs because they are just more comfortable than backless benches. Most of them also have mesh pockets on the side for convenient storage. If it’s too much to carry chairs for every camper, then insulated sitting pads (for sitting on the ground) might be a good alternative.
Then comes the headlamp. Don’t forget this! It’s absolutely essential for safety and convenience. Can you imagine walking in unfamiliar surroundings with logs to trip over and animals that scurry around at night with no light? Or feeling through the dark to get to the bathroom? For many of you, this will also be the only source of lighting within your tent. You can read some books or look at maps for tomorrow’s trip before you sleep. Compared to a flashlight, a headlamp frees up your hand. Make sure you bring enough batteries to last your entire trip.
The lantern is what lights up your entire campsite. I would highly recommend it if you want to engage in any night activities with family and friends. It just creates the right ambiance. And many lanterns can display changing colors and double as a music player. Oh the good times when my friends and I had a mini dance party at our campsite using a lantern.
Optional items:
Like furnishing your apartment, you can keep your campsite minimalistic or go all out. Here are some optional items you can bring.
For extra protection against the sun, rain, or wind, consider a tarp or screen house. A tarp is basically a large piece of waterproof cloth but extremely versatile. You can use it as a piece of ground cloth to protect the bottom of your tent from muddy grounds and moisture. Or use it to build a makeshift shelter for rainy days, under which you can cook, eat, or just hang out. On sunny days, you can create shades both at the campsite and on the hiking trails.
A screen house is like a straight-wall tent with mesh walls. Similar to tarps, it is a shelter during rain showers and in the scorching sun. On top of that, its meshed walls keep the flies and mosquitoes out. You can use it as a shady spot for play with your kids or dinner with your family. Its setup is easier than tarps, but it usually takes up more space.
Bring bug repellent candles if you are camping near the water or in any area where mosquitoes or bugs are more prevalent.
A hammock can be a good addition to any camping site surrounded by trees. Rock and relax while taking in the scenery.
Next up are some items for keeping your campsite clean and organized. A doormat for entry into the tent is something I haven’t thought about at first but turned out to be extremely helpful. It prevents you from taking dirt into your tent and offers you space to take off your shoes.
A clothesline is what you use to hang laundry or wet clothes at your campsite. But you can use it to keep many other items off of the ground, such as your open snacks and small bags. It’s a good way to add storage to your campsite.
Speaking of storage, I use clear plastic bins to store my camping gear and label each box with a checklist of what should be in there. I highly recommend doing this. It just makes packing and unpacking so much easier.
Camp Kitchen + Consumables
Again, like your campsite, your camp kitchen can be as basic or as decked out as you want it to be.
Water jug/dispenser
First on our list of essentials will be a water jug. In the outdoors, you need water for drinking, washing, and cooking. Try to get a 2 – 5 gallon jug and pre-fill at home for a group of 2 – 3. How much more you’ll need depends on your access to water during your trip and your activity level. Most established campgrounds have running drinking water. But you will need to bring more for dispersed camping or backpacking. And a spout/dispenser can be a game-changer for washing hands or getting a steady stream of water. Lastly, getting a compressible water jug can save you a lot of space.
Cooler
The second essential is your cooler, your refrigerator when camping. It allows you to store perishables and gives you more choices for food and drinks. I highly recommend a YETI cooler for longer camping trips since it keeps food cold for days. It was a big investment for me but waayyy better than the cheaper one I used.
You should not get a cooler much larger than what you need because trapping more air will make it less efficient. Remember that ice will take up 30 – 50% of a cooler’s capacity. According to this buyer guide, a 40-quart cooler is suitable for a 3-people day trip, while you’ll want to get a 50 – 60 quart one for a weekend trip. And a quart is about 0.75 cans. I can’t be the only one who can’t visualize how big something is after reading the volume on paper.
I always freeze bottles of water to use as blocks of ice and have never paid for ice on short trips. Blocks of ice will last significantly longer than ice cubes. Plus, you will get extra bottles of water when it melts. Just remember to pour some water out of the bottle before you freeze it because ice takes up more space than water.
Another tip is to get two separate coolers for food and drinks. You will open the cooler for drinks more often than the one for food. So separating them keeps the food cold for longer. Plus, reaching to the bottom of the cooler to get a can of Coke is not fun.
Keep your coolers in shades as much as possible. You can even bring a blanket to cover it at your campsite. If you have to leave it in your car, put it under something else so that it’s not exposed to direct sunlight through the window. We all know how the car can get as hot as an oven in the summer.
Food preparation
You might blank out when thinking about cooking outside. Don’t worry. We’ve got some great tips below to make it as hassle-free for you as possible.
The best tip is to plan your meals before you go since take-out usually won’t be an option. Know how much your group will need and what you will have for each meal. I know it takes time to plan, but trust me you don’t want to be hungry after a long day of outdoor activities.
My personal favorites are some hot dogs and hamburgers. They couldn’t be easier to cook, and the ingredients are so easy to buy. Here are more easy recipes for camping.
Another simple option is foiled food. Here you do all the chopping and mixing at home and wrap it into a foil to cook it over a campfire. Here are more recipes.
I highly recommend you cut your meat and veggies at home whenever possible. One step done at home is one step removed during camping.
Bring some snacks to cut down the amount of cooking you need and have something on-the-go. I like trail mixes since they keep me full for a long time. Energy bars and slices of bread are good options too.
Don’t forget the “little” things like condiments, spices, and cooking oil. If you are bringing wine or beer, don’t forget a can opener.
Cooking with stove
I would say a two-burner stove is basic and essential. You can cook so many things with it. I personally use this Coleman stove and have been loving it. It offers great wind protection, a must-have for outdoor cooking. Remember to get enough fuel for your stove!!
An essential that goes along with a stove would be a cast iron pan. They hold heat very well and are also suitable for cooking over a campfire.
Bring a cooking pot if you want to boil anything. I use it often to make ramens. For myself, I really liked using this bundle.
Cooking utensils are based on personal preferences. But I would say you really need a spatula for flipping pancakes and eggs if cooking with a pan. Other optional items include a wooden spoon, a sharp knife, a cutting board, a mixing bowl. The list goes on and on.
Cooking with campfire
I bet a campfire is the first thing that comes to your mind when you think about camp cooking. It’s a signature experience but not essential. The stove should be enough for most of your needs. To start a campfire, you will need a lighter/match, some firestarters, firewood (usually for sale near your campground), and a hatchet/ax to cut the firewood.
Now you can make campfire s’mores. Remember to bring some roasting forks for your marshmallow or hot dog, and metal tongs to move the wood or coal around. Metal, not plastic or silicone.
Get a dutch oven if you want to cook more elaborate meals over the campfire. I have not used one before, but I’ve heard great things about it.
Eating and drinking
You’ve done all the work up to this point and can finally enjoy the fruits of your labor. But there are a few more things we need:
Plates and bowls. This one is straightforward enough. Consider biodegradable disposable plates. It is not harmful to the environment and saves you the time and hassle of cleaning dishes. Try not to bring anything fragile.
Mugs and cups. Consider insulated mugs to keep your coffee warm on chillier mornings. Again try not to bring anything fragile.
The Clean-up
For many of us, this is the least enjoyable part of cooking. It’s important to keep your campsite as free of litter as possible and follow the no trace protocol. This is not only good for the environment but also for your personal safety. You don’t want a bear to visit your campsite after smelling food waste.
It’s also a good practice to separate garbage and recyclables. Dispose of garbage in campground receptacles when you are away.
I also don’t recommend washing dishes at the campsite unless you are camping with a very large group. Here’s why.
To start off, you likely won’t be able to wash dishes with campground sinks since the drainage is not designed to handle food wastes.
So with no ongoing source of water, you need 3 separate bins. A wash sink with biodegradable soap, a rinse sink to rinse plates from the wash sink, and a sanitize sink for disinfection. Then you need to dispose of all the greywater properly.
Even after all this effort, you may still need to clean your plates again when you get home. So why not just use disposable plates, or wrap your plates then wash them at home?
Storage and transport
I like to have a separate plastic bin for my kitchen gear to prevent grease from spreading.
Have some kind of hard shell box for your dry goods. You don’t want your bread to be squished or your biscuits crushed into pieces.
Pack smaller items like soap, can openers, and spices in a separate container so that they don’t get lost among the gaps of larger items.
If bears are active around your campsite, bring a bear locker or store food in your car. Never leave your food out in the open unattended. At many campgrounds, bear lockers are not only provided but also mandatory.
Clothing & Footwear
It might be tempting to overlook something as basic as clothing when you have 1000 other camping items to think about. But put some thought into this. You can have a much better experience without investing much more.
Warmer times during the day
Striking the right balance between protecting yourself and staying cool is the key challenge here.
Think twice about only packing short-sleeves for hot summer days. In the outdoors, long-sleeves can offer great protection against the sun and mosquitoes. You won’t have to worry about reapplying sunscreen every 2 hours, or constantly waving your arms to keep mosquitoes away. But to prevent yourself from sweating like crazy, choose breathable materials like Nylon and Polyester.
It is almost always a good idea to wear layered clothing, as temperatures can change a lot within a short period of time. Adding a light fleece jacket will usually do the trick. If you want something more versatile, check out jackets with vents in the sleeves that allow you to adjust how warm it is throughout the day.
For inner layers like underwear, socks, and bras, consider ones with materials that draw sweat away from your body, aka moisture-wicking materials.
Rainy weather
I highly recommend getting a rain jacket and rain pants. These are designed to combine waterproofing and breathability. And you need both when hiking in the rain. Other materials like PVC can be highly waterproof but not breathable.
And don’t forget the rubber boots for muddy trails.
Cooler times at night and during sleep
Rather than only taking your pajamas from home, add a few layers, like a sweatshirt or sweatpants, so that you can adjust warmth as needed. Fleece materials are suitable since it holds warmth better than moisture-wicking materials.
It’s also helpful to bring some extra pairs of socks just for sleeping to keep your feet warm.
Other summer items
If you will be by water or a pool, don’t forget your swimsuit and towels.
I also can’t recommend water shoes enough. You never know when you will see a little creek you want to explore. I’ve had times when my friends were walking in the water while I had to hike on land. I didn’t have water shoes at the time, and it sucked.
Many also bring bandanas for sun protection during a hike or as a neck covering when sweating.
Personal Gear
Most items on this list are self-explanatory. Don’t forget your personal belongings.
Hydration is very important for outdoor activities. If you are going on long hikes, consider a hydration pack. With a tube going straight to your mouth, it’s easier to drink consistently when you don’t have to reach into your backpack. Also, consider collapsible water bottles to save space when you carry large amounts of water.
I also recommend getting a daypack, a lightweight backpack built for maximum comfort during hiking. Many also come with a pocket for a hydration pack.
Print your campsite reservations. While many campgrounds accept a reservation on your phone, it’s better to be safe.
Speaking of your phone, remember to have a portable charging device. You can use a USB battery bank, but many camping appliances like lanterns, speakers, and stoves have built-in chargers. Your battery can run out fast especially when you are using your phone to take pictures. And losing communication will be the last thing you want in the woods.
If you will be exploring remote areas, know in advance how you will navigate the area. We are so used to Google/Apple maps nowadays that it’s hard to imagine navigation without them. But maps that only show roads are rarely helpful in the wilderness. So you will need a GPS with topographic maps, or paper topographic maps with a compass. Read more here about how to use a compass. In general, a GPS offers more detailed and easy-to-digest information, but a compass can be more reliable with the right knowledge.
And bring a binocular if you want to see some wild animals, without being bitten of course.
Health & Hygiene
Most items on this list are what we use every day. Some quick tips:
Pick hand sanitizers with alcohol for the best cleansing and protection.
Invest in some quick-dry compact camping towels for longer trips. Regular bath towels are not only bulkier but also take much longer to dry. You don’t want a breeding ground for bacteria in your trunk or backpack.
Don’t forget the insect repellent if you are camping in warmer conditions. It’s a must for me. It can be easily forgotten since it’s not a daily necessity.
Bring extra prescription drugs and contact lenses if applicable. You never know if you are going to drop a lens someday, or need more medication than usual in rough conditions. You have nothing to lose by bringing a few days extras.
Bring some ear plugs just in case. One thing that annoyed me a bit about camping was noise from the street and other campers. Remember a tent is much less insulated than your brick-wall home.
Take an eye mask since tents can get really bright with the first rays of sunshine. No one wants to be woken up earlier than necessary after a long day outdoors.
First Aid Kit
This may be the last thing on your mind when you plan to enjoy the outdoors. After all, who likes to think about how things can go wrong? But I’ve learned my lesson that it’s always better to be prepared. Many items on the list are cheap and easy to find.
The basic first aid kit should address 3 types of problems: cuts/abrasions, sickness, and bug bites/allergies. Depending on where you are camping, some items are more important than others. For example, bug bites would be more prevalent in the south than somewhere like Colorado. So you may want to bring epi-pens for bee stings when camping in the south. See here for a more exhaustive list.
Make sure you bring enough first aid supplies for the entire group. Bring extra if you are camping with kids, who tend to be more adventurous and more prone to sickness.
You can buy pre-packaged kits with everything you need in an easy-to-use bag. One less thing to worry about for your trip. You can upgrade your kit further down the line, but most campers will be fine with just a basic first aid kit.
Learn how to use the kit before you get out in the woods. Most kits come with instructions, and it’s easier than you think. You will be much calmer and know what to do when injuries happen. It’s much harder to figure things out when you are in a fight-or-flight response.
Check the expiration dates of items in your kit if you haven’t used them in a while. Repurchase as needed.
Tools & Repair
Here are some tools that can come in handy during your camping trip, along with some tips and hacks.
Duct tape
Though it may not be obvious, duct tape is one of the most versatile tools in the outdoors. Below are the most common uses:
A temporary patch to holes in anything from tents, rain gear, to even air mattresses. Duct tapes are highly waterproof. It’s been a great temporary solution when my older tent began to leak rain water.
Fix broken tent poles. Wrap it around the broken poles to connect them as one piece. It’s even better if you can reinforce it by wrapping in sturdy sticks/branches along the side of the poles.
Reseal opened snacks and packages. Make those air-tight again and you won’t have to worry about spilled snacks or soggy chips.
Press first-aid cotton pads with anti-bacterial ointment to your wounds or blister. It will free your hands since you won’t have to apply constant pressure for the cotton pad to stay in place.
Twist the duct tape to make ropes, which can be used to hang stuff from the branches, as shoe laces, or as guylines. Check out 2:40 of this video:
Pocket knife
Being small and foldable, a pocket knife is very easy to carry. It would save you some space for other kitchen gear, and you won’t have to worry about a sharp knife scratching your other items. They are also great for cutting fruits and veggies on the go.
If you are planning to go fishing, a pocket knife would come in handy. You can use it to trim the fishing line, cut the bait, or fillet the fish.
Paracords
These are very strong cords that can hold up to 100lb+ of weight. Of course, you likely won’t need that much. I personally use it to tie jackets or other clothing items to my backpack when it gets too warm. That way it doesn’t take up space in my backpack, and I can access it much easier.
If bears are active near your campsite, and there isn’t a food storage locker, paracords are a must for hanging your bear bag with food off of the ground. It’s a good safety practice to never leave your food out in the open unless you want to invite some black furry friends.
You can also use it to make a clothesline to hang your wet clothes if you don’t want to get a separate clothesline.
Interestingly, as I was researching this topic, I found you can use paracords to make common items like water bottle holders and belts. These are definitely for the craftier and more creative campers.
Multi-tool
Multi-tools combine common tools such as knives, screwdrivers, tongs for cooking, and can openers into one. It’s a great way to reduce the hassle during packing and have everything in one place. But make sure the multi-tool you get has what you are looking for since each tool is different.
Tent-pole repair sleeves is the “official” way to fix broken poles:
Repair kits
While duct tape is a great temporary fix to leaks, holes, or broken poles, you would still need a more durable solution. That’s where repair kits come in.
But you don’t need to bring them on every camping trip, especially if your trip is short or your gear is relatively new. Save some space in your trunk and just repair it once you get home.
Recreation & Entertainment
What is camping without the activities and fun? Use this list as inspiration and customize your journey.