Here is our ultimate guide on how to build a campfire.
A campfire is a wonderful addition to any campsite. There’s an indescribable charm and coziness when people gather around a fire at night. This is true whether alone or with friends.
Maybe you can picture yourself in this scene, but your only firemaking “experience” was watching survivalists on TV. Or watching your more camping-savvy buddies.
Don’t worry; fire building really isn’t that difficult. To prove it, we wrote this guide.
To do this, we spent 9+ hours researching the various tips and firebuilding methods. Plus, some of our team members have a touch of pyromania; we’ve definitely had our fair share of playing with fire!
The end result is a guide that takes you through all the steps to build your very own campfire.
- 1. Check the Weather for Fire Risk
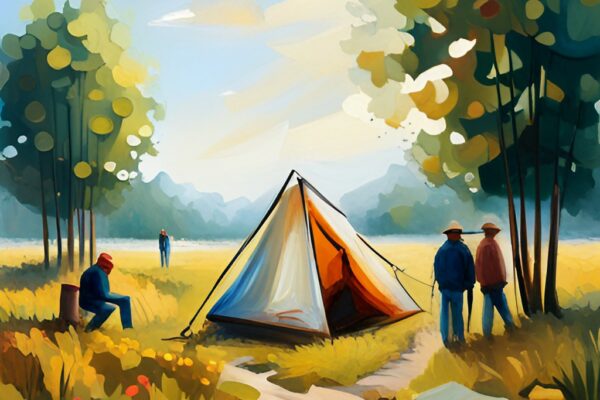
- 2. Choose a Spot to Minimize Fire Danger
- 3. Gather Your Supplies
- 4. Pre-Soak Your Campfire Site
- 5. Place Your Tinder
- 6. Assemble Your Firewood
- 7. Light the Fire with Tinder
- 8. Build the Fire Using Kindling and Logs in the Desired Shape
- 9. Grow the Fire to Stability
- 10. Keep the Fire Steady at the Desired Strength
- 11. Extinguishing the Fire and Cleaning Up the Campsite
- Common Problems with Campfire and How to Fix Them
- Wrap Up
1. Check the Weather for Fire Risk
This should be obvious, but I have to say it: don’t attempt to start a fire when it’s wildly windy.
The wind blows glowing embers, ashes, and other debris towards brush and trees. This is clearly a recipe for a full-blown forest fire, especially during the dry season.
Speaking of dry seasons, check your local fire danger indicator before you start a campfire.
This indicator is a measure typically ranging from “minimal fire risk” to “severe fire risk.” It’s based on a variety of weather factors such as time of year and amounts of rainfall.
If you check the forecast and see rain in the future, don’t despair. Unless you’re in a downpour, you can likely still get a fire going.
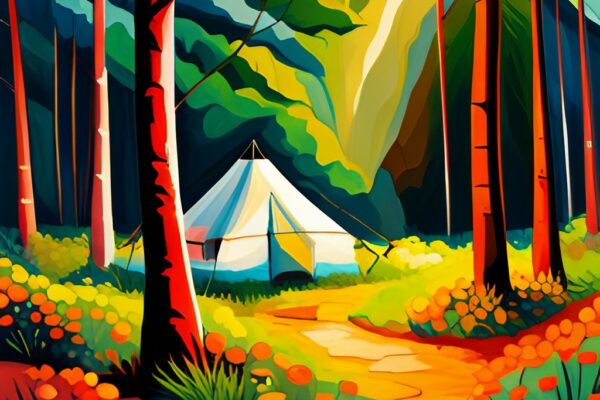
2. Choose a Spot to Minimize Fire Danger
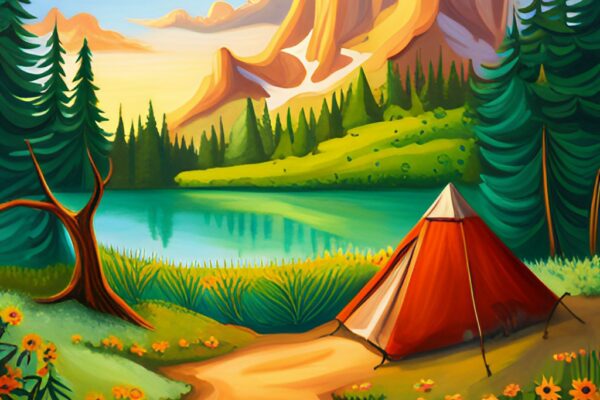
If you’re building your fire at a campsite, then the location should be easy. You simply use an existing fire pit. These are also perfect for starting a fire if the conditions are a little damp.
Why? Because moisture doesn’t just fall from the sky; it also seeps up from the ground. Using a firepit, especially if it’s portable with a metal bottom, mitigates the wet conditions.
Fire pits are also super convenient. You don’t have to think about the best location, or worry about your fire being too close to the surrounding brush.
Now, if you’re in the backcountry, you won’t have the luxury of a fire pit. Thus, the process is a little more involved.
Look for a level clearing that has little to no grass. Dirt or gravel is preferred. Next, make sure you’re in a wide-open area. That is, check that there are no overhanging branches anywhere near you.
Give yourself a nice, tall area to work with. I’ve seen fires grow to five feet in height. Then the wind carries the flames and embers even higher.
Note that the full-sized canopy is fine, and in fact desirable if you need coverage to start a fire in the rain. But this would be dozens of feet up in the air, clear of any and all nearby branches.
Look around and ensure that your tent and all your camping gear is at least 15 feet away. You don’t want a stray ember lighting up your premier tent.
Finally, grab some large stones and encircle them around your chosen spot. These stones act as a barrier. They prevent the flames from creeping along the ground and igniting whatever else is on the ground.
3. Gather Your Supplies
Before you get started, you’ll need the following items. Keep them nearby before you actually light anything on fire. This way, you don’t need to scramble off into the woods because you ran out of kindling!
Tinder
This is what you’ll use to get the fire going. Tinder is basically a catch-all word for anything light enough to easily hold a spark.
This includes grass, dry leaves, twigs, and/or pine needles. Trying to start a fire with anything bigger at this point will just choke it out.
Finding this stuff is pretty easy. Just take a walk in the woods and look down. Whatever you take, try to find the driest pieces. The drier they are, the easier they will catch fire.
Kindling
Next, you need kindling. It’s the next step up from tiny twigs and leaves. Think larger sticks, a half-inch to an inch in diameter.
Like tinder, you can find kindling pretty much anywhere on the forest floor. You can also look for larger branches that have fallen and break smaller sticks off of that.
Firewood/Fuel
The last thing you’ll need to gather is your firewood/fuel. These are much larger chunks of wood that are several inches in diameter. Wood this thick takes longer to burn, keeping your fire going for hours.
If you’re in the backcountry, finding large pieces of wood can be challenging. Again, look for downed trees. Usually, these aren’t too difficult to locate, but you may have to hike around a bit.
If you’re in the frontcountry (i.e: a campground), your life will probably be easier. A lot of campgrounds offer bundles of wood for sale. It’s as easy as heading to the park office or shop.
One thing to note when gathering wood. Don’t cut or pick anything alive. This is for two reasons: live branches still have water inside them. Thus, they don’t catch fire easily, if at all.
Second, you’re destroying the forest. There’s plenty of dead branches that fall naturally to be gathered from the ground.
Water, Shovel, Bucket
Okay, now we have all the fire building materials. We can get started right? Wrong!
Whether camping in the front or backcountry, be sure to have water, a shovel, and a bucket on hand. You never know what could happen, no matter how in-control you feel of the fire.
For example, a particularly strong gust of wind could carry the fluffy, lightweight tinder into a dry bush and ignite it. Hm. Well now you have quite the problem. And if you didn’t bring water, you’re downright in trouble.
The reason for the shovel is to scoop up dirt, if needed, to toss on the fire. Dirt smothers the flames and is an effective method for fire control in addition to water.
Source of Spark
With those disclaimers out of the way, all you need now is your source of spark.
There are some really crazy “survival level” methods, but we’ll stick to the more common spark sources. This could be a box of matches (get waterproof ones; this is a no-brainer, right?), a lighter, or a flint.
Any of these items can easily be found at a hardware or camping store. And if you forgot them and you’re lucky enough to be at a campground, pay a visit to the park shop.
4. Pre-Soak Your Campfire Site
We’re almost there, I promise!
Before you finally set spark to stick, here’s a life hack that I encourage everyone to try. Grab some water and dampen the surrounding area near your firepit. A good three to four feet in and around the fire ring would be sufficient.
Drenching your surroundings makes it far less likely that the immediate area will catch on fire. It’s just good practice and helps reduce the chances for problems later on.
5. Place Your Tinder
Place your tinder in the middle of the firepit. Remember, this is all that light and fluffy stuff.
Putting everything in the center ensures maximum empty space around it so you have room to add plenty of sticks later.
Don’t stress too much about the shape. Just get it vaguely bundle-like. Try to keep the twigs on the outside of the fluff to help prevent the lighter materials from flying away.
6. Assemble Your Firewood
There are several common shapes that are used for assembling firewood. Not only that, the shapes that you use for your firewood/kindling setups can carry over to the larger pieces of wood for the fire.
Teepee

A teepee campfire is great for quickly putting together a cooking rig. Teepees have a wide base at the bottom (the cone shape) which allows a lot of oxygen to flow through.
Thus, the wood heats quickly, making it a great choice for boiling water or warming up dinner.
To build a teepee, simply lean your kindling up against each other in a cone (or teepee) shape.
As your fire progresses, you can transition from kindling to firewood. Thus, you’ll eventually have a large cone of logs in that classic teepee shape.
Platform

Platform fires are also another shape that’s wonderful for cooking. Plus, platforms have the added bonus of being more stable than teepees, which inevitably collapse inward eventually.
As their name implies, platforms are stacked with the large pieces of wood on the bottom in several rows.
When the fire burns down through the logs, the hot coals pool at the bottom of the platform. This perfectly lends itself to cooking with large pots or pans.
Building a platform fire is easy. Assemble your larger pieces of wood in a criss-cross configuration. That is, lay out three logs facing one way, then lay out three more logs on top facing the other way.
Repeat as needed. Then simply place your tinder and kindling on top and in the middle.
Log-Cabin
If you need a fire that lasts a long time, try a log-cabin shape.
Why? The wood on top of the stack falls into the rest of the pile (or the interior of the “cabin”) as it burns. This provides wood for the bottom of the fire, keeping it ablaze for hours.
Building a log cabin fire is as easy as arranging your kindling in a square shape. Like an actual log cabin, stack several logs on top of each other until it’s about six inches high.
Then stick a wad of kindling down in the center. This is the main difference between a platform and a log cabin shape: the fire is lit from the bottom instead of the top.
One added bonus of this over a platform is that the logs framing your tinder pile will provide a bit of shelter from the wind.
As your fire grows, begin stacking the larger logs in a square. Continue piling up until you reach your desired height and amount of wood.
Star
For those times when you can’t scrounge up much wood, try a star shaped fire. There are five or six large logs laid out in a pinwheel or star. In the middle is a large wad of your kindling, framed by the logs.
This is also a great shape for when you have a lot of large logs but don’t have a saw handy to chop them into more manageable pieces.
As the fire burns, it burns from the center out. So you can nudge the logs further into the middle. Because of this, a star doesn’t require much helicopter parenting; it sits and chews on the main five logs.
To assemble a star fire, place your large logs down first. Yes, that’s before your tinder. Then pile your tinder wad on top of the logs in the center.
Lean-To

When you get stuck camping in bad weather, a lean-to shaped campfire is ideal.
Backed up against a large stone or a large log, a lean-to provides shelter from rain and wind (*ahem* mild wind, right? You’re not trying to ignite a fire on a seriously windy day, right?).
Gather a large stone or a large log you intend to burn later. Place your tinder pile right up against this supporting log or stone. Then, lean your kindling sticks against the support.
Lay them at a somewhat shallow angle so that the kindling forms a “roof” or a lean-to. This will protect the delicate tinder and tiny flame from weather while it’s just getting started.
As your fire grows, you can add on larger pieces of wood to the leaning part of the lean-to. You can keep them somewhat smaller than the main piece of supporting wood (or stone).
Or if you think the fire has grown stable enough to survive the weather, you don’t need to worry so much about sheltering the flame.
7. Light the Fire with Tinder
Now that you’ve got everything assembled, you’re ready to light it up!
Strike a match – or your spark source of choice – to the pile of tinder. Hold it steady while you wait for the tinder to ignite. Once a flame appears, blow very gently on it. This adds oxygen to the fire and helps it grow.
Don’t blow too hard, or you’re going to get dirt in your face. You could also blow the tinder away if you didn’t secure it properly.
8. Build the Fire Using Kindling and Logs in the Desired Shape
Once you have a steady, albeit small, flame, add a combination of kindling and tinder. Continue adding as the fire grows.
As you build the fire, lessen the amount of tinder and start increasing your kindling. Do this until you’re only placing kindling on top of the growing fire.
At this point, you’re probably pretty excited. Be warned though – this is the most delicate part of the process. So be careful with how quickly you add kindling.
Otherwise, you could easily suffocate the infant flames before they have a chance to grow hotter and more sustainable.
Keeping that in mind, you’ll want to keep blowing gently at the base of the fire. Again, don’t go crazy with it. This is especially important because now there’s sparks floating around. You definitely don’t want to get those blown in your face.
9. Grow the Fire to Stability
Now that you’ve built your fire, it’s time to keep up the momentum.
Pile on slowly-increasing amounts of kindling/log in whatever shape you’ve chosen for your campfire. As you do this, be careful not to extinguish it.
Although your flames are probably at a good size by now, they can still be smothered by an oversized log. Believe me – I’ve done it!
As in the first steps, continue blowing lightly at the base of your fire. This is really important because fires need oxygen to survive.
Again, be careful not to blow too hard. If you do, sparks and hot ash could get puffed back into your face. Or you could inhale them.
Be smart and use common sense by not putting your face too close to the heat either. Your skin will tell you when to stop!
Now rinse and repeat until you get your fire to however large you’d like it.
10. Keep the Fire Steady at the Desired Strength
Once you’re confident that your campfire is going strong, it’s time to maintain it.
But how do you know if it’s strong enough?
You’ll know your fire is in pretty good shape if you can leave it alone for around fifteen minutes without adding additional fuel. At this point, the fire is hot enough that it can self-sustain without dying down the moment you stop babysitting it.
To keep your fire at this strength, you simply add wood as needed.
This sounds so abstract and vague in writing, but you’ll get a sense when you’re standing in front of your fire. You’ll see it start to slow down a little, and that’s when you can pile on some more wood.
Be careful not to overdo the fuel. Overdoing it can happen in two ways.
The first way is that you’re too good at fire keeping and time all your wood refills just right. Your fire is thriving! In fact, it’s thriving so much that it’s…starting to feel a little unwieldy.
This is obviously a fire hazard. So if you think your fire is growing too tall or just overall growing out of hand, just stop adding fuel. Give it a good long break.
The second issue is that you could be too zealous with the fuel, overloading the fire faster than it can burn. That’s right, even a strong and established fire can still be choked out if you dump larger logs on it than it can handle.
If you see this happen, poke and roll around the large logs. This will bring some airflow, and you’ll likely see the flames underneath hungrily licking around the edges of the logs.
In the end, fire by nature is volatile, and each fire is different in size and circumstances. Thus, they’ll have different requirements and “feeding schedules.”
So trust me: when you’re in front of your own campfire: you’ll get the feel of the necessary timing needed to maintain it.
11. Extinguishing the Fire and Cleaning Up the Campsite
When you’re ready to wind down, don’t just pack up camp and head off. You have to properly extinguish the fire – and make sure it’s really out – before you even think about leaving.
This is honestly a pretty straightforward process that involves a lot of water.
First, you’ll want to drown any remaining flames with copious amounts of water. And even when the cool hissing and white steam fades off, add some more water into the coals. Coals can hold heat for a long time, so it’s important to make sure they’re really out.
Next, take your handy shovel and lightly dig up some dirt around the fire pit. Toss that dirt into your firepit and swirl it around in the ashes to mix thoroughly.
The soil helps further absorb any leftover heat. It also prevents the coals from igniting should any fresh fuel (think dried grass or stray leaves) blow into the pit.
Make sure to look out for any smoke or steam. If you see any of that, your firepit is still too warm. You want the entire area to return to room temperature before you leave. And smoke/steam doesn’t rise from room temperature objects, right?
You’d better make sure you’re thorough with all of that, because now guess what? You get to touch the fire pit!
That’s right – I’m serious about this room-temperature thing. With your hands, check the stones around the firepit, the ashes, and the remaining logs for any sign of heat.
After you do this, take one last walk around your campsite to look for any stray embers or sparks.
Those things can and do just sit around, quietly burning, until they catch dry fuel and ignite into a potentially full-blown fire.
Common Problems with Campfire and How to Fix Them
Maybe you’ve walked through all the steps above, but you’re still experiencing firemaking woes.
Let’s look at a few common problems with campfires. While we’re at it, let’s see if we can fix them too.
Fire Won’t Start
One of the most frustrating things you can experience is when the flame just refuses to catch!
The common culprit can usually be attributed to wet wood. Try looking for sticks that are hanging high above the ground (as in, you can barely reach them). Higher branches won’t be subjected to sitting around in damp ground if it’s recently rained.
You can also peek inside of logs. Sometimes there are splinters of branches and wood inside, kept dry from the elements.
One of the best things you can do is to use an abundance of tinder and kindling. Use way more than that you’d normally gather for a fire in ideal conditions.
If you basically build a kindling fire and stoke it up to strength, then even if your wood is a bit damp, the fire will be hot enough to handle it.
Starting a Fire in the Rain
You may wind up in the unfortunate situation of having to build a campfire in the rain.
If that happens, the first thing you’ll want to do is find dry material. Yes, this will be tough in the rain. As mentioned above, there are a few ways around this.
In addition to those methods, consider packing in some tinder/kindling. If you keep it safe and dry in your pack, then starting a flame should be no trouble.
If you forgot to do this though, try using a knife to strip the wet bark away from the branches. If you carve deep enough, the shavings inside may be dry and small enough to work with.
Once you’ve gathered an abnormally large stockpile of fuel, look for a sheltered place to light your fire. Preferably, this would be under some very tall trees.
This coverage should be enough to block some of the rain, but definitely far enough to be away from the flames.
At this point, the same principle applies regarding a kindling fire. Use a crazy amount of tinder, probably three times the amount for a normal fire. This way, the heat of the well-established tinder/kindling fire will overcome the dampness of the larger fuel pieces.
Be sure to take it slow; don’t just lob large, damp branches on at once. You’ll have to be slower than normal while building up the fire.
The Fire Died!
Ouch. Those much dreaded words! It’s easy to forget to pay attention to fire tending when you’re having too much fun.
Don’t worry – relighting a fire is pretty easy. This is especially true since the coals remain hot for hours after.
Before you begin, grab some more tinder and kindling. Give the coals a gentle stir with a stick to circulate oxygen throughout. You’ll likely see the coals blink to life and light up when you do this.
Place a wad of tinder in whichever spot is glowing the brightest. Then gently blow at the base to increase the oxygen flow.
The fire should reignite at this point. If it doesn’t, you can always strike another match.
Wrap Up
Maybe you can see now that a lot of campfire building just boils down to a little common sense and some finesse. It’s really not that intimidating!
One of the biggest takeaways would be to practice fire safety. Don’t build your fire anywhere near your stuff or dry fuel. Try to refrain from building fires if it’s windy, as the wind can and will carry embers and other floating, fiery ashes to potential fuel sources.
As far as actually building the fire, preparation is key. Be sure you’ve gathered your stores of tinder, kindling, and larger wood pieces in advance.
Otherwise, you’ll be scrambling to get that last handful of kindling before your fire goes out. (And inevitably, it will! *cough* raises hand)
Lastly, don’t be too eager. Treat the fire gently, like you would a baby plant.
Use lots and lots of tinder and kindling to get it started before chucking on the big pieces. You could potentially suffocate the new flames if you do!
We hope this guide has been helpful to you in your quest to build your first (or fiftieth!) campfire.